How to Transfer Photos from iPad to PC: The Complete Guide
If you're looking to copy photos and videos onto a PC from your iPad, File Explorer isn't the only way. You have a few options these days—whether wirelessly, via cloud services, or with a USB cable.

Katrin Gray
Updated on Mar 4, 2026
The Apple ecosystem offers several built-in ways to keep photos synced across devices, but differences between iOS/iPadOS and Windows can create friction.
Knowing how to transfer photos from iPad to PC can be useful if you want to back up your memories locally or free device space. This article explains how to transfer photos from your iPad to your PC Windows 11 or Windows 10 with different ways, and tips for choosing the right one for your needs.
If you're looking for a reliable way that offers selective export and batch management, check out Higospot iPhone Data Transfer. Don't let the name fool you, it's a reputable tool designed for bidirectional transfers of all media files (videos, photos, music, etc.) when built-in tools fall short, and includes more features to manage your iPad or iPhone library.
Table of Contents
Things to consider
Choosing a good way involves evaluating several key factors to ensure it can effectively, securely, and easily copy pictures from iPad to PC.
Here are the key aspects to consider when selecting a photos transfer option:
Ease of use: The process should be simple and intuitive, ideally in a few clicks. The software or service should have a clear, step-by-step instructions so you can use it without technical expertise.
Preview Feature: A vital feature is the ability to preview the pictures on your iPad before transferring to your PC. This helps you confirm the images are intact and what you need.
Data Security: Look for solution that should be safe to use and not pose a risk to your system. Reputable tools work by offering end-to-end encryption to protect your privacy, and don't store your content in the cloud.
Setup and Access: If a software is involved, it should be easy to set up and readily accessible. Choose options that allow transferring photos from iPad to PC without requiring a login first.
Updates: Prioritize solutions that provides regular updates for better performance, bug fixes, and compatibility with new operating systems and storage technologies.
Functionality: The solution should offer all the capabilities you need to avoid using multiple apps. Good tools allow bidirectional transfers (device to computer and vice-versa) and cross-platform support for different operating systems.
Now, let's take a look at how to transfer photos from an iPad to a PC Windows 10/ 11 in every scenario.
Related: How to Transfer Music from Laptop to iPhone
USB cable import via Windows Photos app
Fast for large batches; free software to transfer photos from iPad to PC for full-resolution images
Wired transfers are the fastest and most reliable for moving large numbers of photos and videos to your PC from iPad. It just involves a combination of USB cable and Windows Photos app that's preinstalled.
To use the Photos app to transfer your iPad photos:
1. Connect your iPad to the PC with a Lightning-to-USB cable and unlock the iPad.
2. If this is the first time connecting your iPad to this PC, you may see a prompt on the device asking to "Trust This Computer." Tap "Trust" and enter your passcode if required.
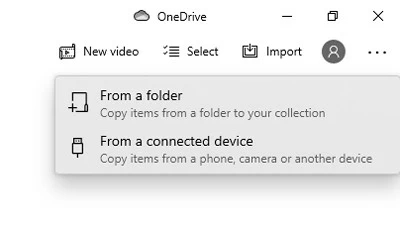
3. Open the Photos app on Windows (you may type Photos in the Start menu).
4. In the Photos app, click the Import button in the top right corner of the application window.
5. From the dropdown menu that appears, select From a connected device or your iPad's name.
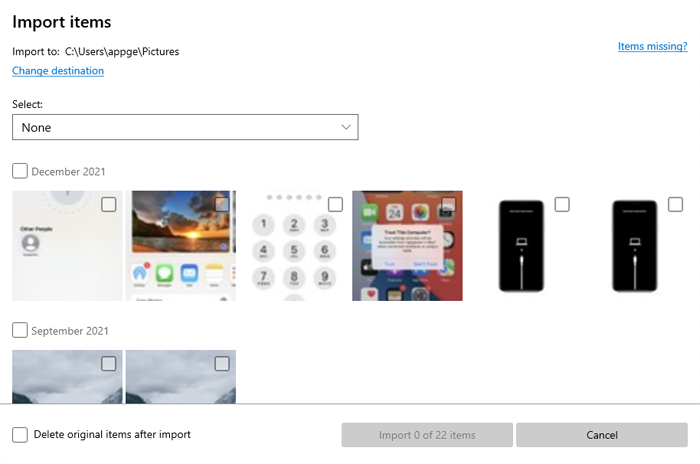
6. The Photos app will now scan your iPad for photos and videos. This may take a moment, depending on how many files you have. Once loaded, you will see a screen displaying all the new photos and videos available for import. By default, all new items may be selected.
7. Deselect any items you don't want to import by clicking the checkbox next to them.
8. Optional: Change the folder location where the photos will be saved on your PC through a "Change destination" or gear icon near the top of the import screen. By default, they will be saved in a subfolder in your Pictures folder, organized by date.
9.Once you have selected the photos and confirmed your settings, click the Import selected or Import button to begin the transfer.
Once finished, your imported iPad photos will be available in the Photos app and in the save location you specified on your PC.
Import iPad photo transfer tips
- Keep the iPad unlocked and awake during photo transfer.
- If Photos doesn't detect the iPad, try using another cable and reconnect, or reinstall Apple Mobile Device drivers.
- Use a good cable and a direct USB port (avoid hubs for large transfers).
- Verify files after import before deleting anything from the device
If the Photos app fails to transfer photos from iPad to PC free, go with File Explorer, which exposes the iPad's DCIM folder so you can drag and drop images directly to your PC.
Related: How to Reset iPhone without Passcode and Computer
File Explorer (Windows) direct copy
Treat the iPad like a camera and offer a fast and free way for a simple copy of the iPad photos
If you prefer direct file control, open File Explorer, find the iPad, navigate to Internal Storage > DCIM, and copy folders or individual pictures to your PC. This method is often considered the most straightforward copy-n-paste route when the Photos app won't import, as your iPad appears like a standard digital camera's memory card.
Note that HEIC images will appear as native files. you may need to convert later if your editing software requires JPEG.
Here's how to transfer pictures from iPad using File Explorer on a Windows PC.
1. Connect your iPad to your PC using a reliable USB cable.
2. Open File Explorer on your PC. (You can press the Windows key + E shortcut)
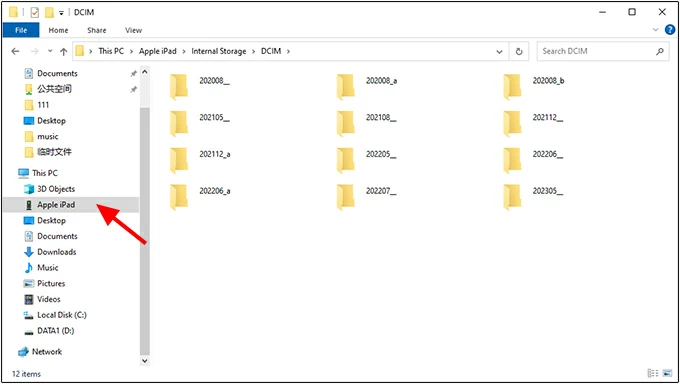
3. In the left sidebar, click on "This PC." (or "Computer")
4. Under the Devices and drives section, your iPad should appear, usually labeled as "Apple iPad" or simply "iPad." Double click it.
5. Double-click the Internal Storage folder that appears.
6. Navigate to the DCIM Folder. This is the standard folder where all photos and videos taken with the iPad's camera are stored. Double-click the most recent folder to view your latest photos, or browse through the folders as needed.
7. Select the photos and videos you want to import.
8. Copy the selected files/folders by right-clicking the selection and choosing Copy or by pressing Ctrl + C.
9. Paste the files/folders by right-clicking in the destination folder and choosing Paste or by pressing Ctrl + V.
Once the transfer is complete, safely disconnect your iPad from the PC.
Offer selective export, advanced organization, and more controls
If you don't like the built-in ways that Windows offers, using a dedicated tool like Higospot iPhone Data Transfer offers significant advantages, especially for users who want more control, better organization, and the ability to handle the entire device library, including your music, photos, videos, contacts, messages, and other files.
Win Download Mac Download
Main features:
- A simple flow with clear options and actions
- support bidirectional transfers, meaning you can transfer your photos, videos, and music from your device to your computer and vice versa.
- Photos are displayed and browsed by albums (Favorites, Selfies, Live Photos, etc.) and dates, just like on your iPhone/ iPad.
- Comes with a handy HEIC converter
- Allow to transfer between Apple iPhones and iPads
- Transfer and edit your music library
- Easily browse, archive, and export iMessages, SMS, and WhatsApp chats locally
- Make custom ringtones
Follow these steps to copy photos from iPad to PC.
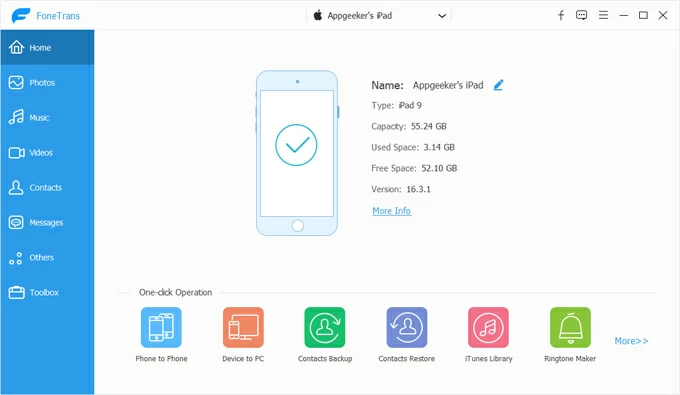
1. Open the iPhone Data Transfer application and connect your iPad. The device will appear in the screen with basic information.
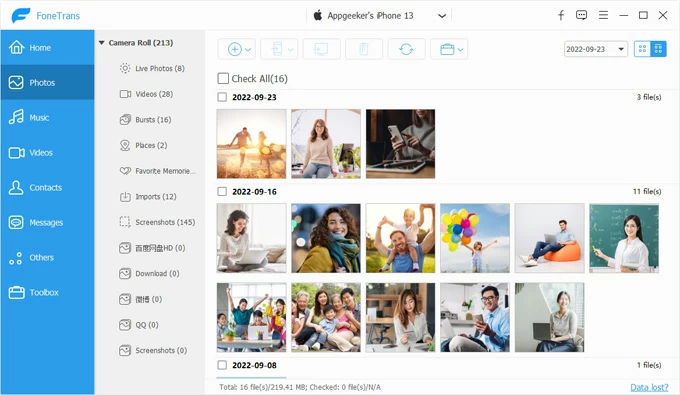
2. Access your photos library by choose Photos from the data list in the sidebar. The software will take a moment to load and display all photos and videos from your device's photo library. See screenshot below.
You don't have to relearn the steps to use it each time and can feel confident while you're working with your photos.
3. Use the Sidebar to view your photos by Albums (like Live Photos, Place, Imports, Bursts, or custom albums you created). Use the View Switcher (located in the top right corner of the toolbar) to switch between Grid or List views.
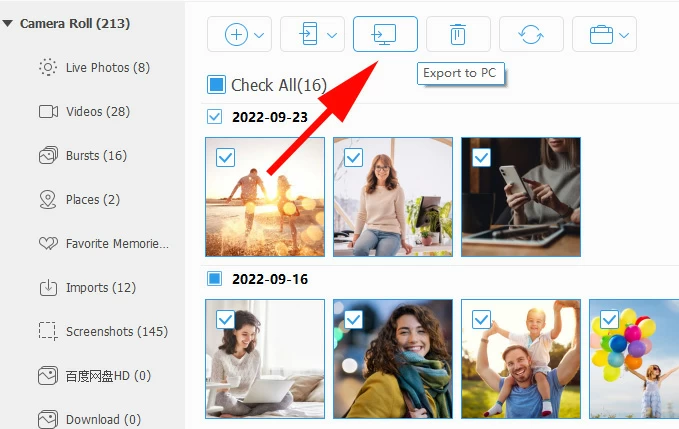
4. To download iPad photos to PC, select any photo or video you want; or tick the box next to "Check All" to select the entire album, then click the Export to PC icon on the top toolbar.
Alternatively, right-click on the image after selection, in the opening context menu, select Export to PC.
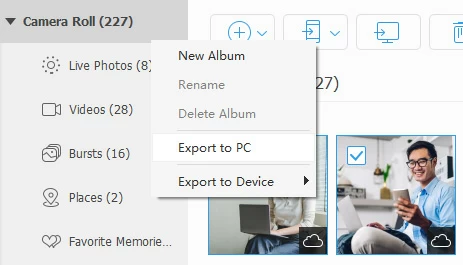
You can also right-click on a specific album, then select Export to PC to import all of the photos inside the album.
As you can see in the software's tool, there are options for you to migrate items to device such as iPhone, iPad, create new album, rename, delete album, and other useful controls.
Higospot iPhone Data Transfer provides the comfort, control, and functionality that the native Apple/Windows process often lacks. It changes the photo management experience from a tedious, technical chore into an organized, visual task.
Related: How to Transfer Videos from iPhone to PC
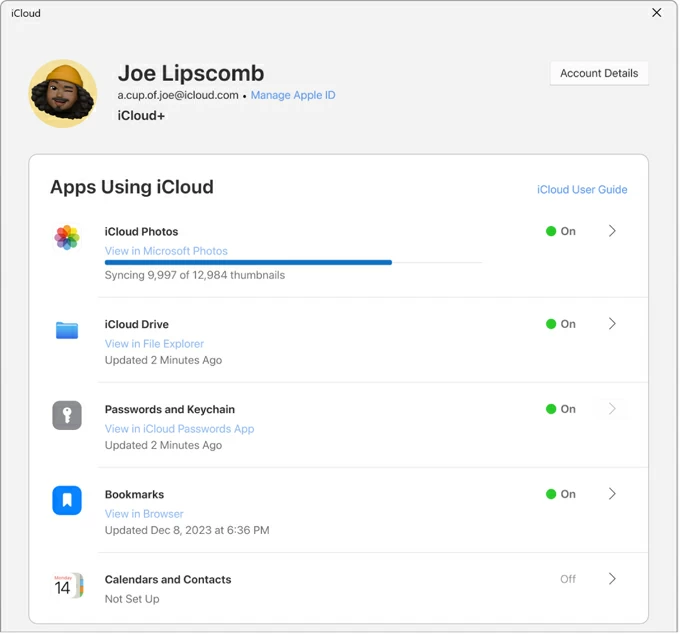
iCloud for Windows
Sync photos automatically to PC without cables; keeps originals in iCloud if enabled
iCloud Photos keeps your iPad library synced across Apple devices and can download photos to a Windows PC when you enable Photos option in iCloud for Windows app or through a webpage. Please note, iCloud storage limits may require a paid plan for large libraries.
Here's how to transfer picture from iPad to PC via iCloud. First of all, go to Settings > [Your Name] > iCloud > Photos, turn on Sync This iPad. Sync depends on internet speed and may take time for large uploads.
1. Open your web browser on your PC and navigate to iCloud.com.
2. Sign in with your Apple ID. You may need to enter a two-factor authentication code from your iPad or another trusted device.
3. Click on the Photos icon. Your entire iPad library will load.
4. Hold the Ctrl key and click on each photo and video you want to transfer.
5. Click the Download icon, which looks like a cloud with a downward arrow (usually located in the top-right corner).
Related: How to Recover Deleted iMessages from iCloud
If you want to use iCloud for Windows to copy photos from iPad to PC, do the following:
1. Go to Settings > [Your Name] > iCloud > Photos, turn on Sync This iPad.
2. Download and install iCloud for Windows from the Microsoft Store or Apple's website.
3. Open the iCloud for Windows app and sign in with the same Apple ID you use on your iPad.
4. In the iCloud app window, configure Photos option: ensure "Photos" is checked.
Under "Download new photos and videos to my PC," you can see the folder location (usually C:\Users\[Your Name]\Pictures\iCloud Photos\Photos). You can change this location if needed.
5. Open File Explorer on your PC and navigate to the iCloud Photos folder (or the custom location you set).
6. The folder will populate with thumbnails of all your photos and videos. Initially, they are placeholders to save space on your PC. You can usually wait for iCloud to download all the full-resolution photos, or Select the specific photos or folders you want, right-click, and choose "Always keep on this device." This immediately forces the download of the full-resolution originals.
If needed, you can copy those photos to a separate folder on your PC. This ensures you have a solid local backup that won't be deleted if you later disable iCloud Photos or delete photos on your iPad.
About Katrin Gray
Katrin Gray is the Junior Editor at HigoSpot. With a bachelor's degree in Computer Applications, he has been covering Microsoft Windows, Apple macOS, iOS, Android, Social Media, Gaming, and more as a professional writer for over 5 years.
 iPhone UnlockerRemove iPhone & iPad lock screen
 iPhone Data TransferTransfer and manage your iPhone & iPad data
 Android UnlockerRemove Google FRP lock and bypass screen locks
 iPhone Data RecoveryRecover deleted files from iPhone, iPad
 Location ChangerFake a GPS location easily
 Video DownloaderDownload videos from 1000+ sites