How to Import Photos from SD Card to iPhone: Drag-n-Drop Supported
Unlike Android devices, there is a steep learning curve to get the hang of videos and photos transfer from an SD card to an iPhone. Here are step-by-step instructions for how to set up your transfer.

Katrin Gray
Updated on Dec 9, 2025
Let's say you have the cable to plug the iPhone into the computer USB port, connect your camera or drone where you have shot a lot of photos and kept on an SD card, but when you try to copy and paste or drag and drop the photos, nothing happens. So, how can you get photos from SD card to iPhone?
According to Apple Support, you can set up a specific folder for photos from the SD card, and use iTunes in Windows or Finder on a Mac to sync those photos to your iPhone. Or install an iCloud app on the Windows, enable iCloud Photos, sync the photos with all your Apple devices, including iPhone. You can even use the dedicated third-party tool, something like Higospot iPhone Data Transfer, which basically can transfer anything to and from iPhone (bidirectional), not only photos — drag-and-drop supported.
Let's check out your options for importing photos from SD card to iPhone.
Table of Contents
How to get pictures from SD card to iPhone with iTunes or Finder
Basic steps: copy the pictures from the SD card to a folder on your computer, then use iTunes on Windows or Finder on macOS to sync that folder to your iPhone.
The classic method. If you've already installed iTunes on your PC (macOS comes with Finder by default), the iTunes app is the quickest way to make a transfer. The primary drawback of using iTunes is the process would delete the existing photos already on the iPhone when you sync the new ones.
Also, if "iCloud Photos" is enabled on the device, the manual sync option is not available. You need to turn it off before syncing photos from SD card to iPhone via iTunes.
Preparation:
- iTunes installed on Windows
- USB cable to connect iPhone
- SD card reader or camera connection
- Disable iCloud Photos on the iPhone: Settings > [Your Name] > iCloud > Photos > turn "Sync This iPhone" off.
Related: iPad Says Security Lockout
How to transfer photos from SD card to iPhone with iTunes sync
1. Insert the SD card into your PC or use a USB card reader
2. Import or copy the photos into a dedicated folder. On Windows you can use File Explorer or the Photos app import wizard to pull images from the SD card into a local folder — this is the recommended first step so iTunes can see a single folder to sync from.
3. Connect your iPhone to the PC with cable.
4. Launch iTunes, click on the device icon in the top left.
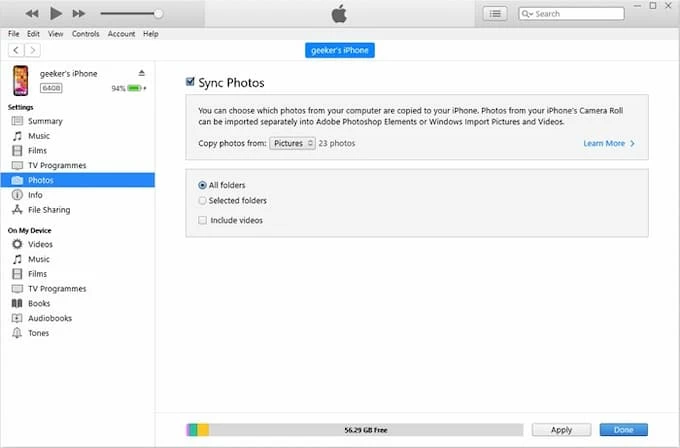
5. Select the Photos tab in the left sidebar.
6. Check the box next to Sync Photos. If you can't see this option, you're using iCloud Photos to manage your photos, toggle it off.
7. choose Copy photos from, and point iTunes to the top-level folder which contains the folder of photos you want on the iPhone.
It's advisable to create subfolders or albums on PC to organize photos before syncing, so iTunes can mirror them as albums on the iPhone.
8. Choose All folders or only Selected Folders. Tick the Include videos if you want to transfer videos, too.
9. click Apply or Sync at the bottom right corner.
All of the photos from your SD card will eventually be copied to the iPhone's Photos app.
Attention: Syncing photos can change album structure and overwrite the existing library on your phone. If you change the source folder on your computer, a subsequent sync can delete photos from your iPhone if they are no longer in the source folder.
Related: How to Reset iPhone without Passcode
How to get pictures off SD card to iPhone with Finder sync
Modern Mac machines use the Finder for device sync rather than iTunes. You will want to import photos from the SD card into Photos or a folder, then use Finder to sync to the iPhone as appropriate. Be sure to turn off iCloud Photos on the phone to make the manual Sync Photos option available. Here's how:
1. Import SD Card photos to your Mac.
2. Connect your iPhone to your Mac with a USB cable.
3. Open Finder and select your iPhone under Locations.
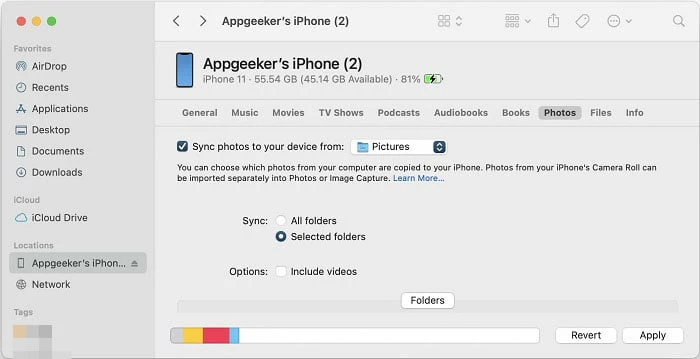
4. Go to the Photos tab.
5. Check Sync photos to your device from and choose the folder or Photos app. You can create "albums" by creating subfolders on your Mac. Each subfolder will be a separate album on the iPhone in the Photo app after syncing.
6. Click Apply. The selected SD card photos will transfer directly to your iPhone.
After syncing, open the Photos app on the iPhone and check the Albums tab — your folders should appear as albums and the images should be visible.
Basic steps: install a dedicated file transfer tool on computer, connect your SD card, use "Add" feature or drag-n-drop to import your photos to iPhone, without touching the existing photos on the phone.
Is there a way to drag individual photos from an SD card and drop them onto an iPhone without iTunes sync? More importantly, is it possible to do it the other way around and transfer photos from your iPhone back over to your computer?
That's where Higospot iPhone Data Transfer, a reputable iOS management tool that's designed to give you back the control over your iOS device that Apple often limits to the cloud or restrictive synchronization methods. The tool comes includes drag-and-drop simplicity and allows Apple users to transfer media files (music, photos, videos, etc.) selectively between their devices and computer, manage device data (like contacts, messages and call history), and even create custom ringtones.
Win Download Mac Download
If you want to quickly download photos from SD card to iPhone, it's definitely worth checking out. Here're detailed steps on how to do.
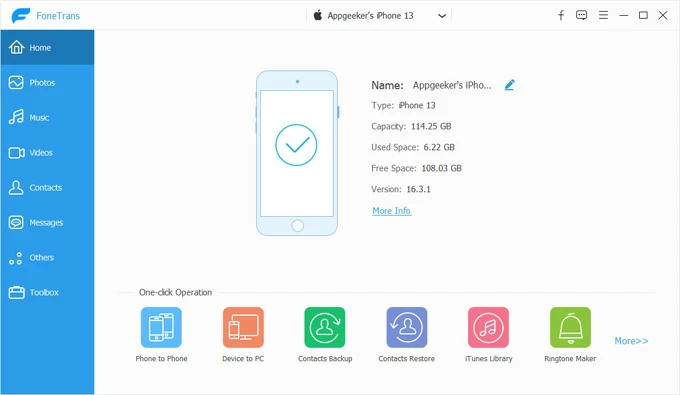
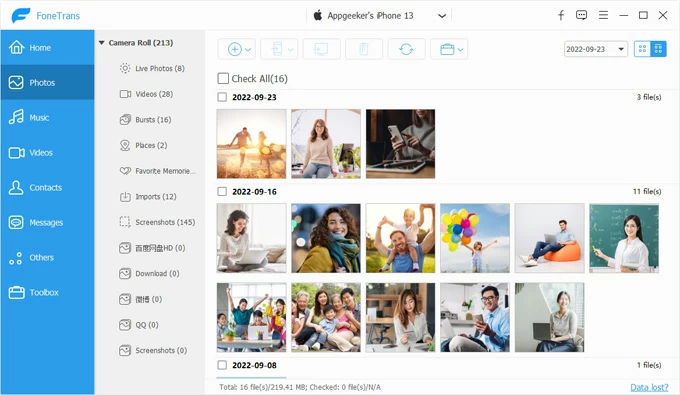
Step 1. Launch Higospot iPhone Data Transfer from your PC or Mac, then connect your iPhone using a USB cable. If it's your first time connecting, you may need to tap "Trust" on your iPhone and enter your passcode.
Step 2. Click on the Photos icon in the left sidebar of the window. The tool will load your device's photo library and list all existing albums, such as Live Photos, Bursts, Videos, Places, Screenshots, etc.
Tip: The tool allows you to create a new photo album where the imported pictures will be stored on your iPhone by right-clicking on the albums list.
Step 3. To import pictures from SD card to iPhone, you drag and drop the photo files directly into the specific album on the tool's window. Make sure that you have already opened the SD card's folder on your computer and locate the photo files.
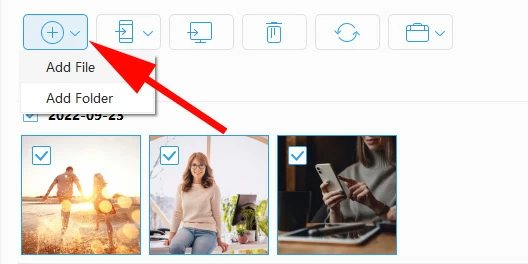
Alternatively, look for the Add button (see below) in the top toolbar of the tool's window and click it. In the drop-down menu, select either Add File or Add Folder. A dialog box will open, prompting you to select the entire folder or individual image files from your computer (the photos you copied from the SD card). Select and click Open.
Higospot iPhone Data Transfer will begin the transfer process, copying the photos from your SD card to your iPhone. The progress should be finished instantly.
Once the transfer is complete you will see the pictures in your Photos app on your iPhone.
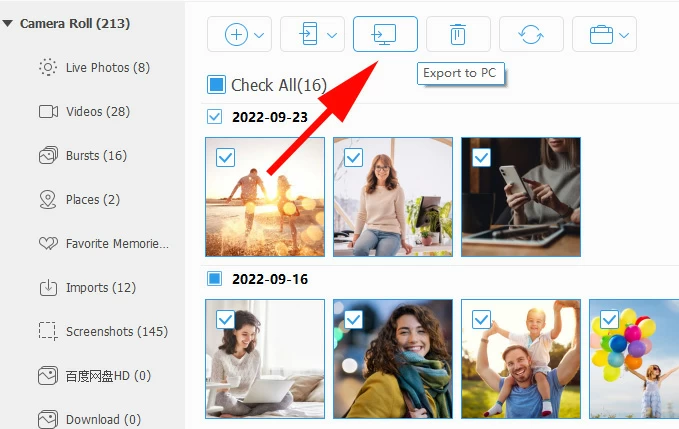
Bonus: to export your photos from iPhone to computer or another iPhone/ iPad, you just select what items you need, then click the Export to PC or Export to Device button on the top toolbar.
Related: How to Transfer Music from Mac to iPhone
How to transfer photos from SD card to iPhone using Email
Basic steps: send an email from your computer with the photos stored on the SD card as an attachment, and send it to your own email address. Access the email on your iPhone, download and save them.
This is another way that doesn't require using iTunes sync or cables. It's convenient, but it's only practical for a small number of low-resolution photos due to email attachment size limitations. Most email services, like Gmail, let you send up to 20-25 MB of attachment per email.
Anyway, if you wish to use email to transfer pictures from an SD card to an iPhone, follow these steps:
1. Place your SD card into your computer's built-in card reader or an external USB card reader.
2. Select the photos or album you want on the iPhone, create a ZIP file or folder.
3. On your computer, open your web browser or email client and compose a new email.
4. Click the "Attach File" or paperclip icon and select the zip file or folder you made from the SD card in Step 2. Wait for them to upload.
5. Send the email.
6. On your iPhone, open the email you just sent yourself.
7. Tap on a photo attachment to view it in full screen, tap the Share button, and then select Save Image.
The photos will now be saved to Recent album in the Photos app on your device.
How to get photos off SD card to iPhone with iCloud
Basic steps: enable iCloud Photos and upload the SD card photos to iCloud from your PC browser or iCloud for Windows app.
If you prefer wireless, continuous syncing across devices, you can also upload photos from SD card to iPhone using an online storage service. Here we'll use Apple's iCloud for this example, but any service (Google Photos, OneDrive, Dropbox, etc.) accessible from your PC and your mobile phone should do the trick.
Prerequisites:
- iCloud Photos Enabled: Settings > [Your Name] > iCloud > Photos > Sync this iPhone.
- Ensure your iCloud storage plan has enough free space to hold the photos and videos you are transferring.
How to use iCloud to upload pictures from SD card to iPhone
1. Open the SD card's folder on your computer and locate the photos you want to transfer to iPhone.
2. Open a web browser on your computer and go to icloud.com/photos.
3. Sign in with your Apple account, and then Click the Upload icon (cloud with an arrow pointing up) in the toolbar.
4. Upload the photos from your SD card to iCloud photo library. This process can take a significant amount of time depending on the number and size of the files and your internet upload speed.
Once the photos are uploaded to iCloud Photos, your iPhone will automatically detect the newly uploaded photos in the cloud.
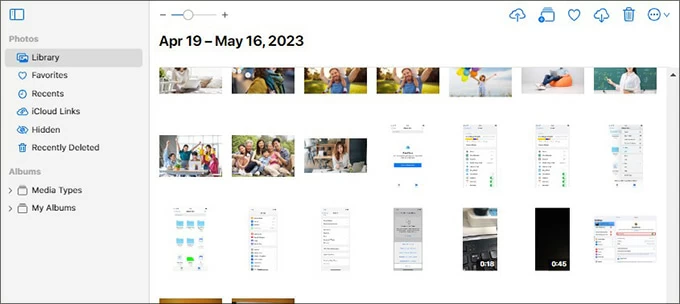
5. Open the Photos app on your iPhone.
6. The new photos will begin appearing in your Library/Recents album.
Related: iPhone Text Messages disappeared
Troubleshooting common problems
Photos don't appear after sync with iTunes?
Confirm iCloud Photos is off, ensure the correct folder was selected in iTunes, and check that the images are in supported formats (JPEG, HEIC, PNG). If the Photos app shows nothing, try re-syncing after restarting both devices.
iPhone not recognized?
Ensure the Lightning cable is genuine and functional. Try a different USB port.
Albums not mapping correctly?
Make sure each album is a separate subfolder inside the folder you selected in iTunes; iTunes uses that folder hierarchy to create albums on the iPhone
Duplicates or missing images?
Use the Windows Photos import settings to avoid duplicates, and keep a backup copy of the original SD card files before any mass operations
Large libraries or slow syncs?
For thousands of images, consider syncing smaller batches or using third-party transfer tools like Higospot iPhone Data Transfer to avoid long iTunes or iCloud sync times.
Best practices for smooth photo transfers
To get a better transfer of your photos from SD card to iPhone, there are a few things to do:
- Group photos into folders by event or date. iTunes mirrors these as albums.
- iTunes supports common formats like JPEG, PNG, and HEIC. If your SD card contains RAW files, convert them first.
- Keep a copy of your photos on your computer or external drive. Syncing is not a substitute for backup.
- Update iTunes and iOS to minimize compatibility issues.
Conclusion
When it comes to importing SD card photos to iPhone, iTunes remains the most straightforward and official route for many users. And there are wireless cloud services, as well as third-party file transfer tools available to use. By preparing your SD card, organizing photos, and configuring necessary settings, you can get photos from an SD card to iPhone library seamlessly.
In a world where memories matter, mastering this process ensures that your photos are always at your fingertips—ready to share, edit, or simply enjoy.
About Katrin Gray
Katrin Gray is the Junior Editor at HigoSpot. With a bachelor's degree in Computer Applications, he has been covering Microsoft Windows, Apple macOS, iOS, Android, Social Media, Gaming, and more as a professional writer for over 5 years.
 iPhone UnlockerRemove iPhone & iPad lock screen
 iPhone Data TransferTransfer and manage your iPhone & iPad data
 Android UnlockerRemove Google FRP lock and bypass screen locks
 iPhone Data RecoveryRecover deleted files from iPhone, iPad
 Location ChangerFake a GPS location easily
 Video DownloaderDownload videos from 1000+ sites