How to Change Location on Your iPhone 12
For some reasons, you might want to change your iPhone 12 location. Check this guide to see how to do it easily via a GPS spoofing software.

Pauline Larson
Updated on Dec 2, 2025
By use of a GPS faking 3rd-party tool, to change an iPhone 12 location is a simple and quick process.
In order to get weather updates or directions to a destination, your iPhone 12 needs your real-time location for providing accurate information. However, you could decide whether to let your iPhone or apps gain your location by turning on and off Location Services in Settings.
Also, you may want to change your iPhone 12 location in some cases, like fooling some location-based apps or hiding from someone. In this case, you can utilize Location Changer, a professional but easy-to-use software to implement an iPhone's location change without jailbreak.
Note: Rest assured that nothing else will be deleted or affected from your iPhone 12 after the location is changed by the software. It's completely safe.
Below, we'll show you how to change the iPhone 12 location in details.
Table of Contents
Why do you need to change the iPhone 12 location
There are plenty of reasons for which you would feel like changing your iPhone 12 location.
- To fool dating apps for possible matches: When you are using a dating app like Tinder, you might want to change the location on your iPhone 12 to find new matches in other areas.
- To play some games: Playing games like Pokémon GO requires you to go to different places in reality for more Pokémons. However, after you change your iPhone 12 location, you can easily achieve anywhere you want for more fun without actual movement.
- To trick your friends in social media apps: Sometimes you may want to fake a trip to somewhere you've never been before on some social media apps like Twitter or Facebook, to make a joke with your friends that you are enjoying a beautiful holiday. Then you'll need a location change on your iPhone 12.
- To hide from someone who is obsessively tracking you: Your boyfriend or girlfriend, or one of your family members cares about you so much that he or she keeps tracking where you are every now and then. By changing your iPhone 12 location, you can be relieved at times.
Change iPhone 12 location by altering your Apple ID region in Settings
In order to change the location on your iPhone 12, you can simply alter the Apple ID region in Settings. Here're the steps:
1. Go to Settings and tap your name at the top.
2. Tap "Media & Purchases."
3. Select "View Account" from the pop-up menu.
4. Enter your Apple ID password if you are asked to sign in.
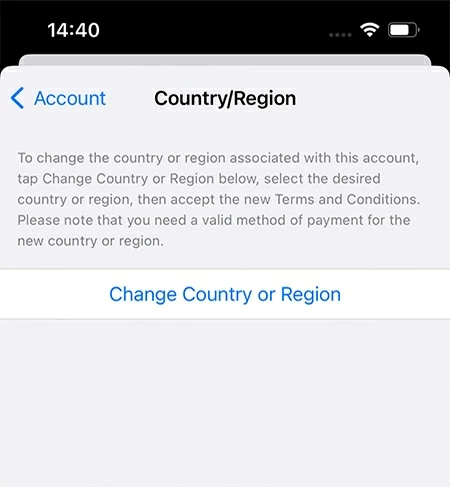
5. Tap "Country / Region."
6. Tap "Change Country or Region."
7. Pick up a country or region that you want to change to.
8. Check the terms and conditions, and tap "Agree" to confirm the change.
9. Choose a payment method and fill in the payment information as required.
Note: By this means, you can only change your iPhone 12 to an approximate location rather than an accurate and exact one.
How to change the location on your iPhone 12 easily by Location Changer
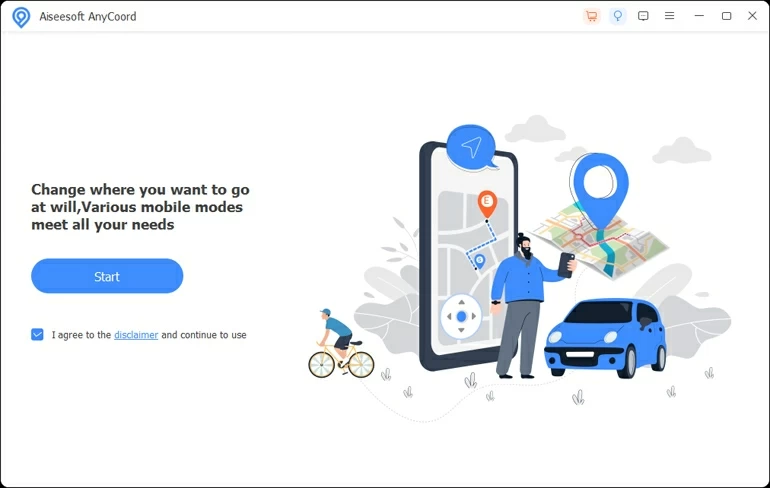
If you want to change your iPhone 12 location to a more precise place, Location Changer can help you out. Compatible with all models of iPhone and iPad, it is a desktop-based software that allows you to change your virtual location and stimulate GPS movements easily. In addition, it's also simple to use thanks to its intuitive layout.
Free Download Free Download
The days of jailbreaking to change iPhone location are over with the introduction of this software. All you need is a computer, a lightning cable and Location Changer. Here you're good to go.
Option 1: Change an iPhone Location
Changing your location virtually on your iPhone 12 is now no longer a big deal. Follow the steps to get your iPhone location changed easily by Location Changer.
Step 1. Install Location Changer on your Mac or PC, then run it on your desktop.
Step 2. Hit "Start" and connect your iPhone with your computer via a lightning cable.
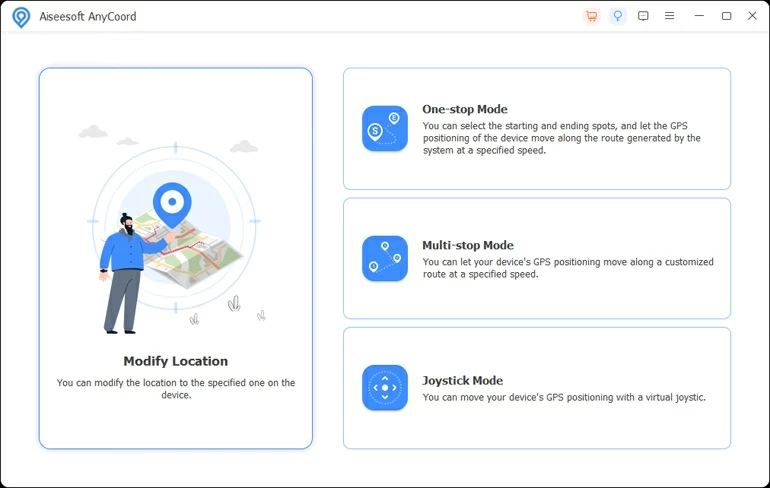
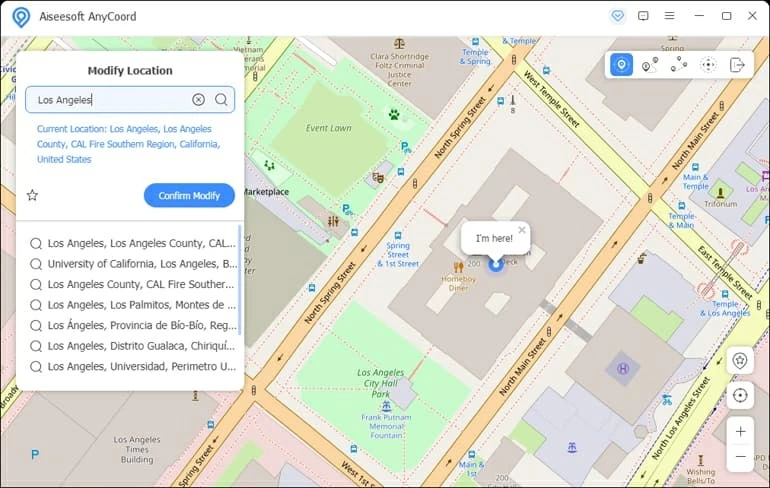
Step 3. The next page will show you four modules. Select "Modify Location" in the left.
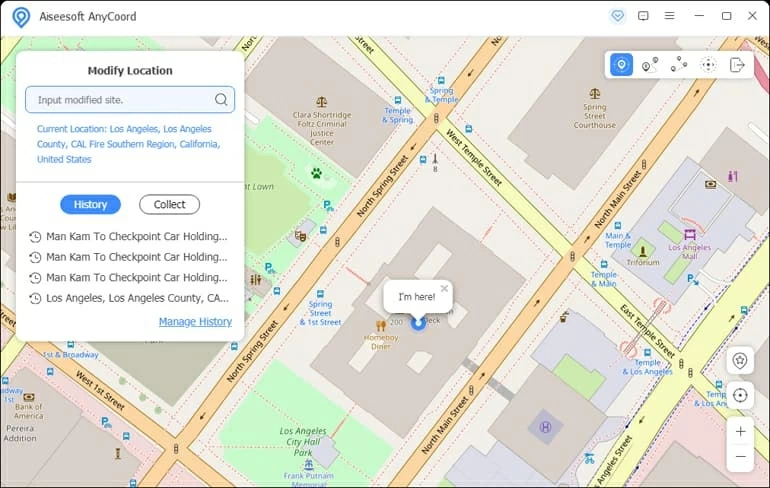
Step 4. A map will show up on your screen, with your current location displayed. You can click the "Center on" icon on the sidebar to emphasize where you are actually.
To change your iPhone location, you can input the place name to search for a location you wish to teleport to, or find the destination on the map manually.
Note: If you have not enabled developer mode in your iPhone yet, you will be prompted to do so. Just turn it on without any worries.
Tip: You can browse the location history by clicking "Manage History" to see what locations your iPhone has been changed to before.
Step 5. Finally, click the "Confirm Modify" button, and boom, you have been successfully changed to a new location, virtually of course.
Tip: You can also collect the location by clicking the star next to "Confirm Modify", which enables you to change your iPhone to this location more conveniently next time.
Option 2: Mock GPS movement on a customized route
Too lazy to actually play location-based games like Pokémon GO? You can now draw a route and stimulate movements on a map to reach virtual locations using Location Changer!
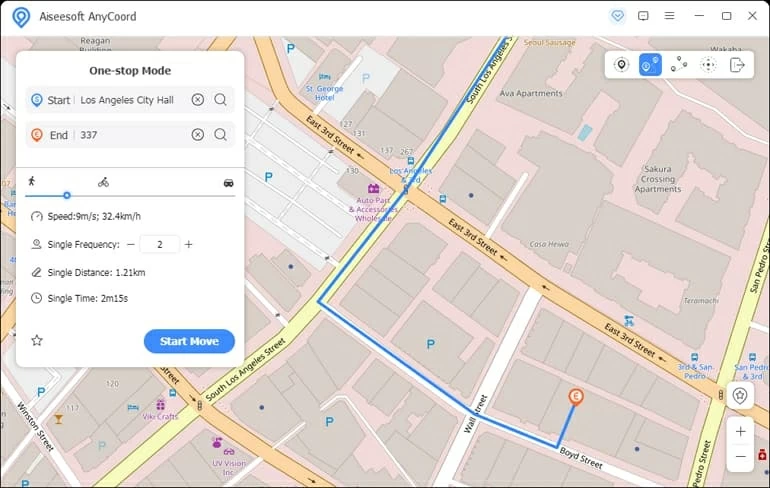
One-stop Mode
It's a stimulating movement mode to only one destination, which is between 2 points. Let's see the steps below.
1. Among the four modules in the main interface mentioned above, click "One-stop Mode" in the upper right.
2. Select a starting and ending point of your virtual journey.
3. Customize the speed by simply dragging the slider, and set up the times of this journey by adjusting "Single Frequency."
4. Once all the details are finalized, click on the "Start Move" button and watch yourself virtually go through the journey, while stretching in bed!
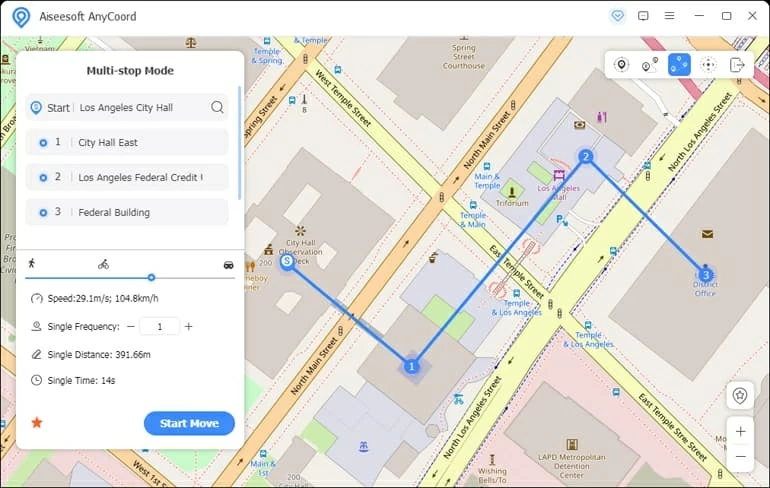
Multi-stop Mode
If you want to stimulate movements through several different places, we've also got you covered!
1. In the main menu mentioned above, click "Multi-stop Mode" in the middle right.
2. Set up the points you want to stop by or pass through.
3. Customize the speed and the times of the journey.
4. Hit "Start Move" and watch the show!
Tip: Any route can also be saved as a favorite by clicking the star next to "Start Move."
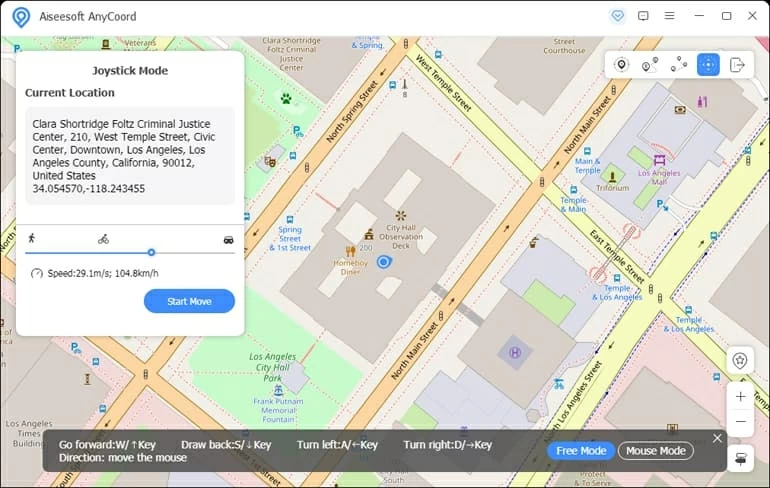
Joystick Mode
Sometimes, you might just want to wander randomly in the streets virtually, and in this case, Joystick Mode can get you the fun! Simply follow these steps.
1. In the main menu mentioned above, click "Joystick Mode" in the lower right.
2. You can choose "Free Mode" or "Mouse Mode" from down below.
3. Customize the speed.
4. Hit "Start Move" and you can then use the direction buttons as instructed below the map to navigate your virtual self.
FAQs
- 1. Do I need to jailbreak to change my iPhone 12 location?
- Fortunately, using Location Changer does not require you to jailbreak your iPhone and you can change your iPhone location anyway.
- 2. How do I turn off my location on iPhone 12?
- If you don't want to share your location with any apps, you can simply disable it in Settings. Go to Settings > Privacy> Location Services and turn off location sharing.
- 3. Can I see the location history on my iPhone 12?
- Yes. You can check it in Settings > Privacy > Location Services > System Services > Significant Locations. Here you will see the places you've been recently along with the frequency and time that you've stayed.
About Pauline Larson
Pauline Larson is a writer and journalist who has been well-experienced in technology industry for almost 10 years. She has posted various professional articles in different tech-related sites and magazines, as she is deeply fascinated with digital technology, especially with Apple's products.
 iPhone UnlockerRemove iPhone & iPad lock screen
 iPhone Data TransferTransfer and manage your iPhone & iPad data
 Android UnlockerRemove Google FRP lock and bypass screen locks
 iPhone Data RecoveryRecover deleted files from iPhone, iPad
 Location ChangerFake a GPS location easily
 Video DownloaderDownload videos from 1000+ sites