How to Transfer Ringtones from iPhone to iPhone: A Complete Guide
Get a brand new iPhone and want to use your own custom ringtones? Follow these steps, and you may be able to transfer ringtones from your old iPhone to the new iPhone in no time.

Katrin Gray
Updated on Jan 13, 2026
If you're anything like me, while moving from the old iPhone to the latest generation, you may expect all personalized ringtones to move seamlessly along with apps, messages, photos, and settings. Apple's ecosystem is designed to make transitions smooth, especially with features like Quick Start, iCloud, and AirDrop. Yet, ringtones remain one of the few data types that don't always transfer automatically.
For those who rely on custom ringtones for work, organization, or personal preference, losing them during migration can be frustrating. In this article, we'll show you how to transfer ringtones from iPhone to iPhone, ensuring that no custom tone is left behind.
If you have a computer nearby, you can directly install a reputable tool named Higospot iPhone Data Transfer to transfer your custom ringtones from an iPhone to another without touching existing content on the target device. You can also simply drag your tones from a local folder and drop them to the device.
Things to know
Before you decide to transfer ringtone between iPhones, it's important to know that ringtones are not treated like standard user data while using Apple's device-migration tools, several complications contribute to the challenge:
1. iCloud backs up most personal data, but custom ringtones—especially those imported manually or created outside the iTunes Store—may not be included. Users often assume everything will transfer, only to discover missing tones after setup.
2. Purchased ringtones are linked to Apple ID, not the device. Ringtones bought from the iTunes Store can be re-downloaded, but only if they are still available in the store, and both devices are signed in with the same Apple ID.
3. Custom ringtones created in GarageBand or imported via Finder/iTunes don't sync automatically.
The following sections provide a complete solution for transferring ringtones from an iPhone to an iPhone. Each method is categorized by ringtone type and user scenario, ensuring clarity and accuracy.
Related: How to Recover Deleted Call History on iPhone
Transfer Ringtones Using Quick Start
If you bought a new iPhone and need to transfer your ringtones from the old device, Apple's Quick Start performs a direct device-to-device migration.
When to Use
- You are setting up a new iPhone.
- You want to transfer everything from the old device.
- Your custom ringtones were originally added through GarageBand or Finder/iTunes.
Steps to transfer ringtones
1. Place both iPhones near each other.
2. Turn on the new iPhone and select Set Up Manually or wait for the Quick Start prompt.
3. When the animation appears, scan it using the old iPhone.
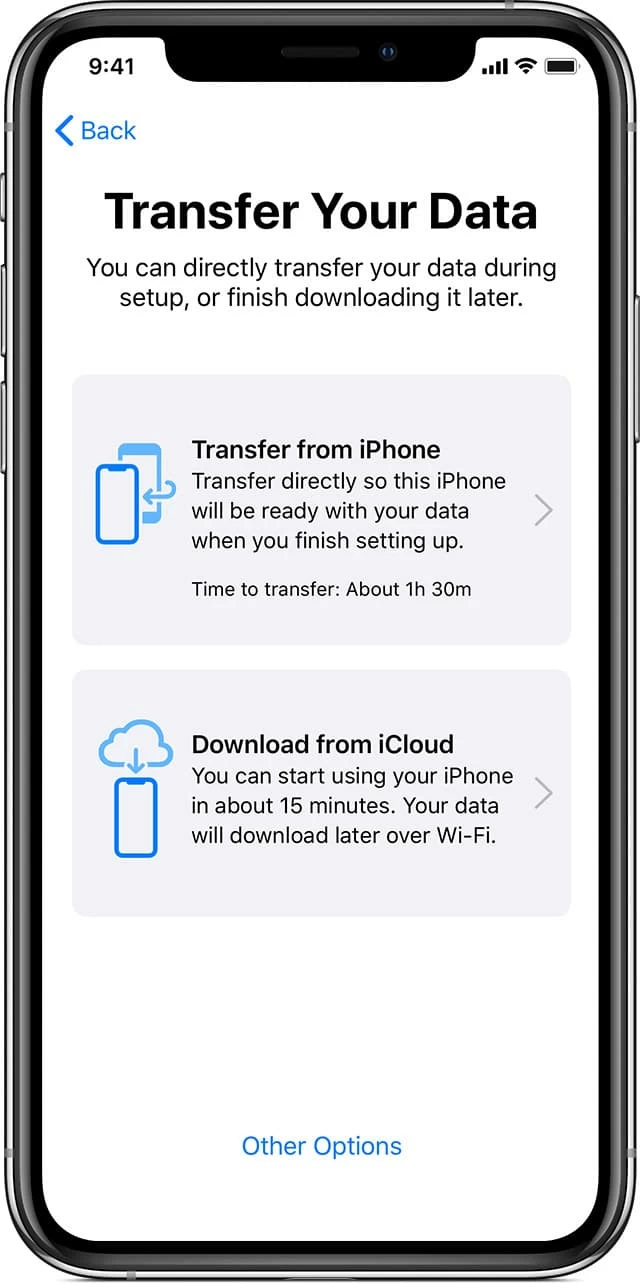
4. Choose Transfer from iPhone.
5. Keep both devices connected to power and Wi-Fi until the transfer completes.
Related: How to Erase iPhone without Passcode
Re-Download Purchased Ringtones from the iTunes Store
If your ringtones are purchased from iTunes Store, you may still re-download it onto your new iPhone while registering with the same Apple Account.
When to Use
- You purchased ringtones using your Apple ID.
- You want to restore them on a new iPhone without connecting to a computer.
Steps to transfer purchased ringtones
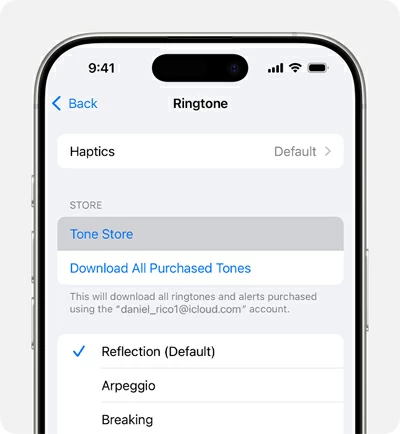
1. Open Settings on the new iPhone.
2. Go to Sounds & Haptics > Ringtone.
3. Scroll to the top and tap Download All Purchased Tones.
The iPhone checks your Apple ID purchase history and restores eligible tones.
Transfer Ringtones Using AirDrop
Sharing ringtones between iPhones is surprisingly easy once you understand how AirDrop handles audio files.
What You Need Before You Start
- Two Apple devices (iPhone, iPad, or Mac) with AirDrop enabled
- A ringtone file in .m4r format
- Both devices must have Wi‑Fi and Bluetooth turned on
- Devices must be within close range
If your audio is still in .m4a or .mp3, convert it to .m4r first—this is the only format iOS accepts as a ringtone. There are a lot of online .mp3 to .m4r converter FREE to handle the conversion. After you have converted the audio files to .m4r format,
Steps to transfer ringtones with AirDrop
1. On both iPhones, go to Control Center (swipe down from top-right) and enable AirDrop for "Contacts Only" or "Everyone. "
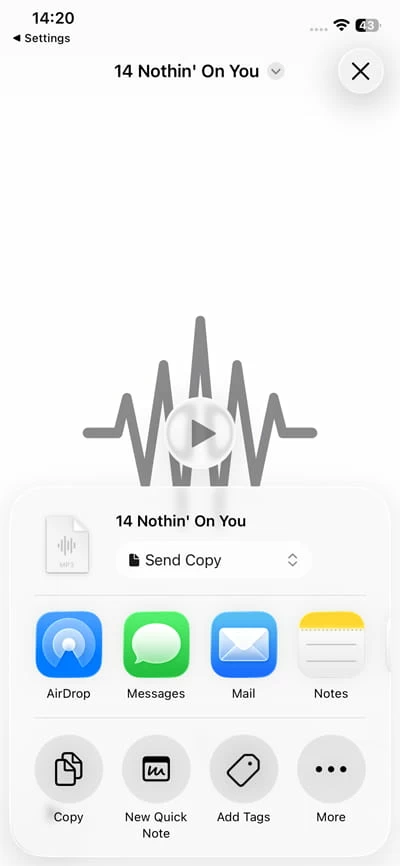
2. On the source iPhone, open the Files app, find your custom ringtone (.m4r), tap the Share icon, and select AirDrop.
3. Choose the new iPhone from the AirDrop list.
4. Tap Accept on the new iPhone when prompted. The file will save to the Files app (not directly into Settings > Sounds path).
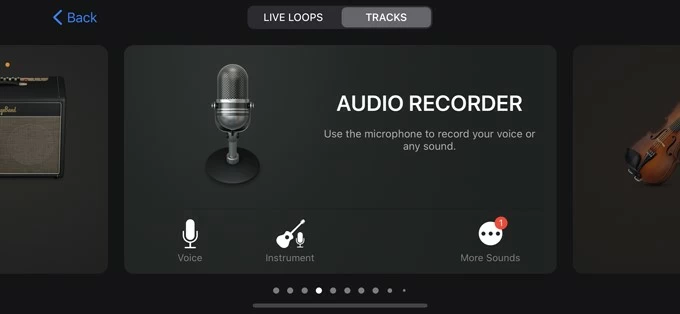
5. Open GarageBand app. It should be preinstalled on your new device.
6. Tap Audio Recorder > Tracks View to create a new project.
7. Tap the Loop icon (top right), choose Files.
8. Locate the .m4r file saved before and import it.
9. Drag the file into the track area, trim or adjust if needed.
10. Tap the down arrow > My Songs.
11. Long-press the project and tap Share.
12. Select Ringtone. Name it and tap Export.
13. After export, choose Use sound as… and set Ringtone / Text tone / Assign to contact or go to Settings > Sounds & Haptics > Ringtone and select it.
Transfer ringtones with third-party tool
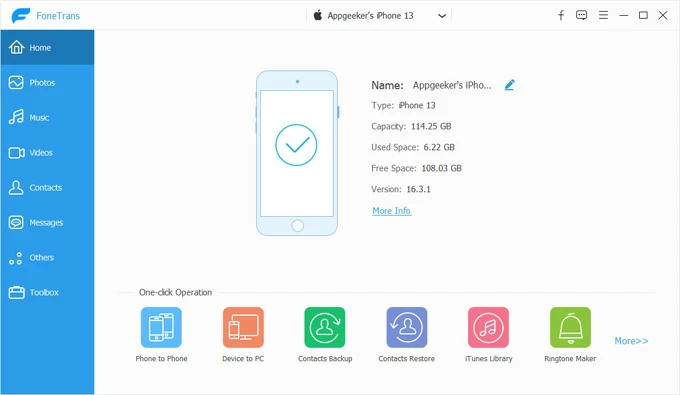
If you're looking for a simple and reliable way to transfer your ringtones from the old iPhone to your new iPhone, or import tones from computer, Higospot iPhone Data Transfer is the way to go. You just connect both devices to the computer, open the software, select the ringtones from your old iPhone, click "Export to Device," select your new iPhone, and you're good to go.
Even better, the software includes a ringtone maker, helping you create custom tones from a song for your iPhone. Additionally, there are a set of tools available to transfer your media files (photos, videos, music, etc.), export, and manage the library far beyond what iTunes or iCloud can offer.
Win Download Mac Download
Here is how to moving ringtones from iPhone to iPhone.
1. Launch the software on your computer. Connect both iPhones via USB to the computer. Make sure the old iPhone is set to appear on the interface (you can do this by click the small arrow in the top center to choose the source device.)
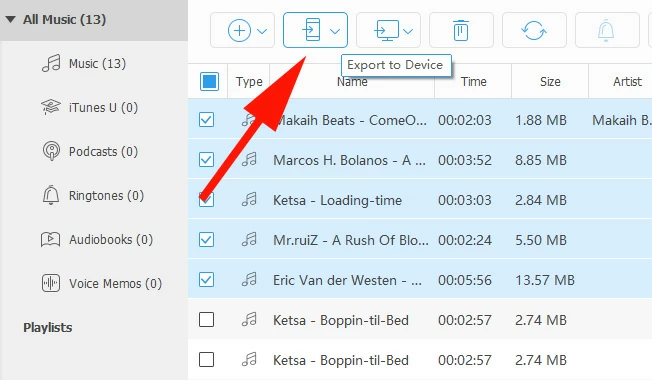
2. On the left sidebar, choose Music. After the source iPhone's music library appears, select Ringtones on the leftside bar.
3. Select the ringtones you want to transfer, then click Export to Device icon on the top menu.
4. In the opening list, select your new iPhone.
Done! transferring a ringtone from one iPhone to another is straightforward and simple.
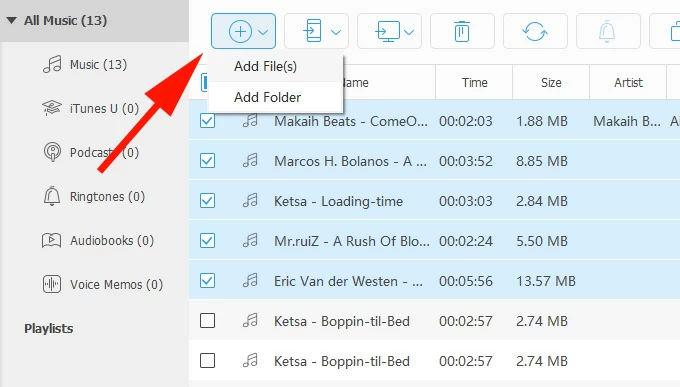
You can also import your ringtones (or songs) from hard drive on your computer. Simply find the tones you need, then drag and drop them to the Ringtones list. Alternatively, use the Add-to-import feature.
More feature available for you to manage your iPhone library.
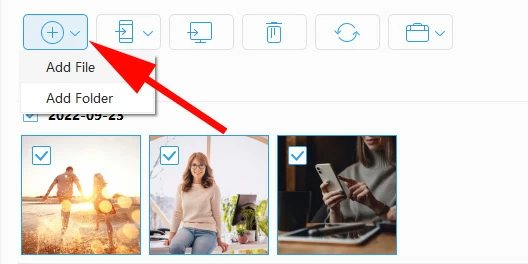
Import photos to your iPhone:
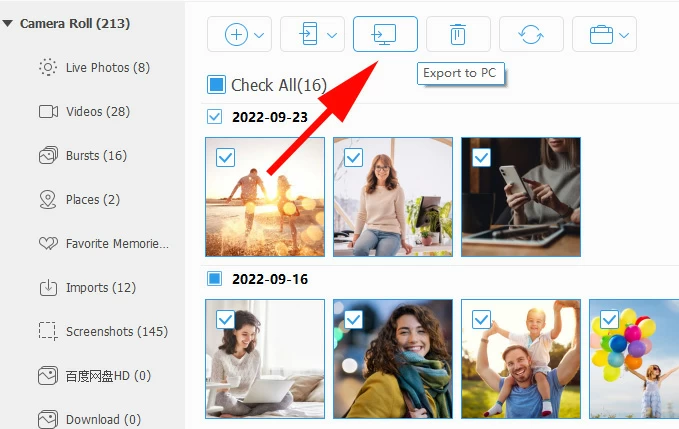
Export pictures from iPhone to computer or another device:
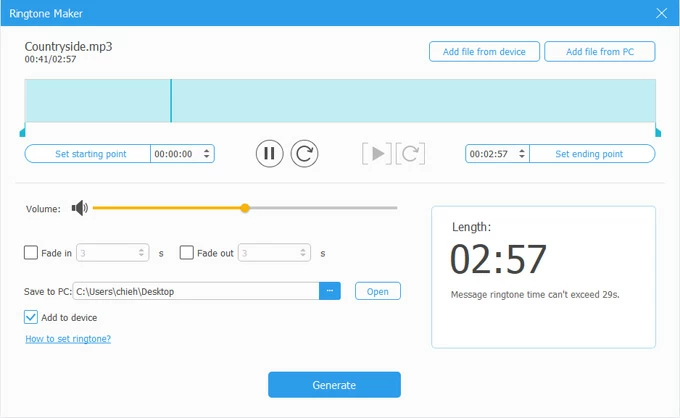
Ringtone Maker:
One-click functions
Related: How to Transfer Pictures from iPhone to Laptop
Transfer Custom Ringtones via Finder (macOS) or iTunes (Windows)
For fans of iTunes or Finder, you still can use Apple's route to transfer your ringtones to iPhone on the computer. Again, make sure the created or downloaded custom tones is .m4r format, and they are under 40 seconds.
Note, Finder or iTunes can't extract ringtones directly from an iPhone. This method only works when your ringtones are already stored on your computer.
On a Mac:
1. Connect the new iPhone to your Mac.
2. Open Finder.
3. Select the iPhone from the left sidebar under Locations.
4. Open the folder on your Mac containing the .m4r ringtone.
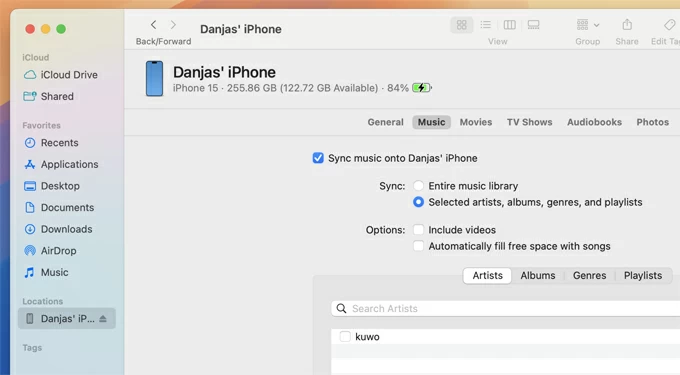
5. Drag the .m4r file directly onto the iPhone name in the Finder sidebar or into the blank space in the Finder window. (keep the General page up on the screen of Finder)
Finder instantly syncs the ringtone to the iPhone. No progress bar, no confirmation message — it just appears on the device.
On a Windows PC:
1. 1. Connect the new iPhone to your PC.
2. Open iTunes.
3. Open the folder containing your .m4r files.
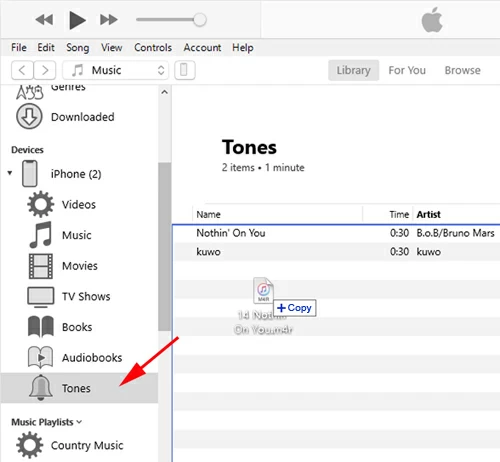
4. Drag the .m4r ringtone(s) into the Tones section of iTunes. If you don't see Tones, enable it by going to Edit > Preferences > General, then check Tones.
The ringtones will appear under Library > Tones.
5. Select your iPhone in iTunes.
6. Go to Tones under On My Device.
7. Enable Sync Tones.
8. Click Apply or Sync. iTunes will copy the ringtones directly into the iPhone's ringtone library.
If you need to set a ringtone on your new iPhone, go to Settings > Sounds & Haptics > Ringtone, then choose from custom tones you just imported.
About Katrin Gray
Katrin Gray is the Junior Editor at HigoSpot. With a bachelor's degree in Computer Applications, he has been covering Microsoft Windows, Apple macOS, iOS, Android, Social Media, Gaming, and more as a professional writer for over 5 years.
 iPhone UnlockerRemove iPhone & iPad lock screen
 iPhone Data TransferTransfer and manage your iPhone & iPad data
 Android UnlockerRemove Google FRP lock and bypass screen locks
 iPhone Data RecoveryRecover deleted files from iPhone, iPad
 Location ChangerFake a GPS location easily
 Video DownloaderDownload videos from 1000+ sites