How to Reset Disabled iPhone without iTunes
If your iPhone is disabled and you failed to factory reset it with iTunes. Here are 4 simple and helpful methods for you to reset iPhone without iTunes when it's disabled.

Sandy Archila
Updated on Dec 9, 2025
Your disabled iPhone can be saved by factory resetting it without using iTunes.
If you forgot your iPhone's lock screen passcode, after several wrong attempts, the iPhone will prompt "iPhone is Disabled" on the screen. When you want to reset the disabled iPhone, Apple offers a way - put the iPhone into Recovery Mode and reset it with iTunes.
However, for many users, iTunes is not an easy-to-use software and it fails to reset an iPhone due to various bugs. For example, your disabled iPhone can't connect to iTunes or it's stuck in Recovery Mode, etc. The good news is, you can still use a couple of workarounds to regain access to the disabled iPhone by resetting it without iTunes.
This guide provides 4 handy solutions on how to reset disabled iPhone without using iTunes. For instance, Higospot iPhone Unlocker, iCloud, Find My app, and Finder on Mac are all available to assist you with resetting your disabled iPhone without iTunes.
Note: If your iPhone is running iOS 15.2 or later, the screen will appear "iPhone Unavailable" or "Security Lockout" instead of "iPhone is Disabled."
Table of Contents
Before resetting disabled iPhone without iTunes
You should try guessing passcodes for the disabled iPhone before resetting it without requiring iTunes. If you really couldn't recall the passcode, resetting the disabled iPhone is the last and only way to unlock it.
A factory reset will remove all your data and settings from the disabled iPhone so that you can regain access to it, which means all the photos, messages, and other contents in the iPhone will be deleted. Can you recover your lost data after the reset? Of course, If you created a backup using iCloud or a computer before the iPhone was disabled, you can restore the data after the factory reset.
Reset disabled iPhone without iTunes via iCloud
iCloud is a cloud storage place that maintains your content, such as photos, videos, documents, and more. Another important feature of iCloud is Find My iPhone, which allows you to locate the device or erase it when it's lost or stolen.
If your disabled iPhone has Find My enabled in advance and it's connected to the network, you can factory reset it using iCloud Find My iPhone on a computer without needing iTunes.
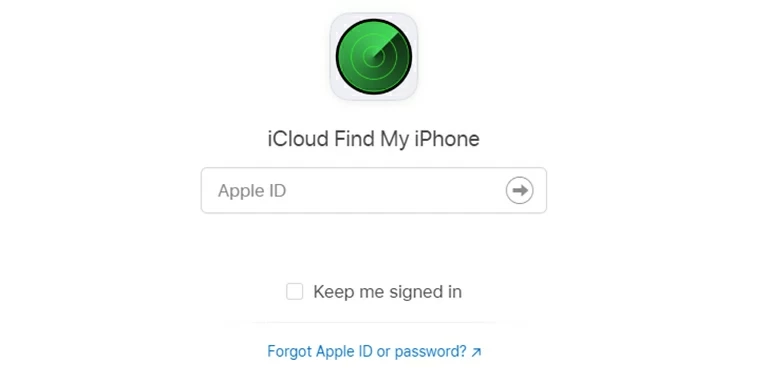
1. On a browser, go to iCloud.com and sign in to the Apple ID that your disabled iPhone used.
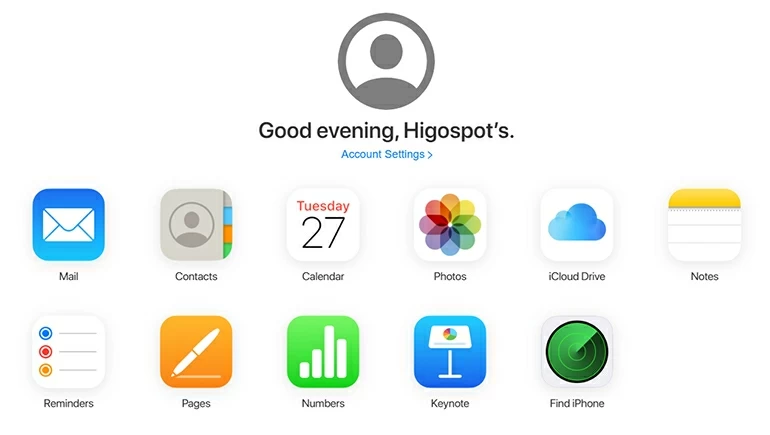
2. Select Find iPhone on the lower right of the page.
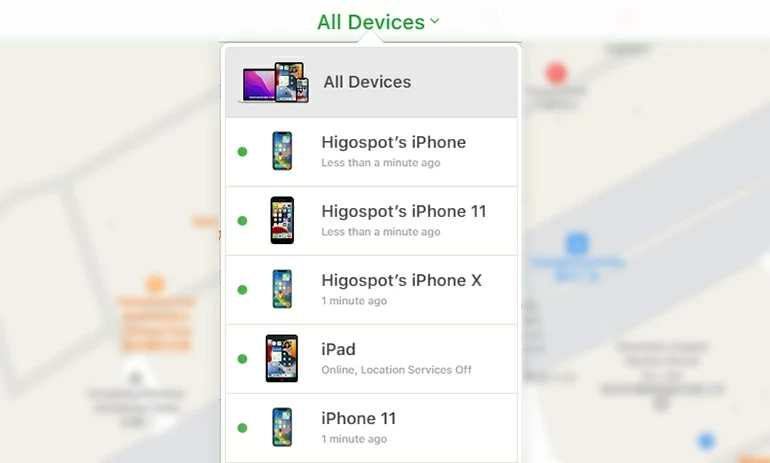
3. Click on All Devices at the top of the page and choose the device you want to reset.
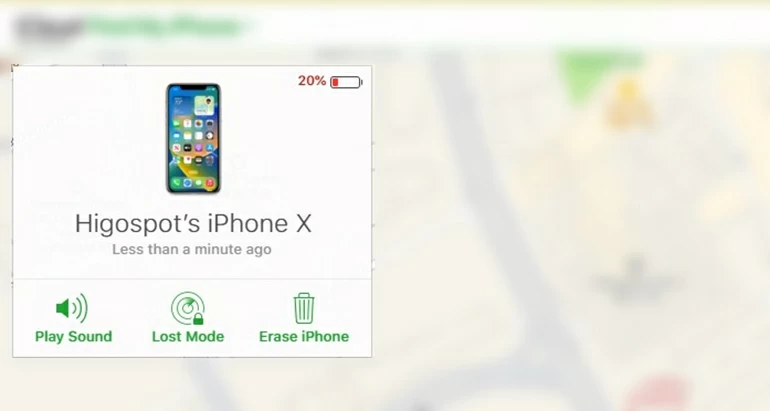
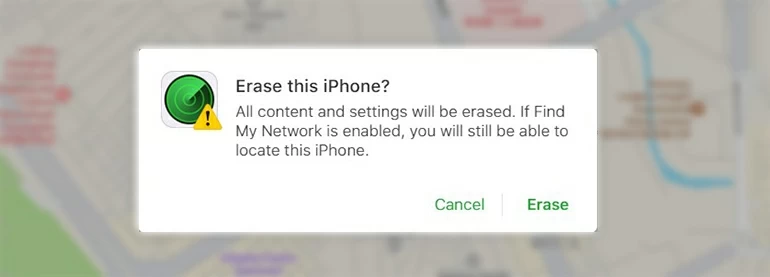
4. Click Erase iPhone on the pop-up window.
5. Then, a warning window will prompt, click Erase to confirm the reset. Your device will start resetting automatically.
How to factory reset disabled iPhone without iTunes via iPhone Unlocker
When you're struggling to reset your disabled iPhone with iTunes, the process may come up with many errors. But don't be frustrated. There's a handy software created to reset disabled iPhone on a computer without requiring iTunes - Higospot iPhone Unlocker. With its simple interface and application for any iPhone model, you can easily factory reset a disabled iPhone in a few clicks.
Free Download Free Download
Steps to reset disabled iPhone without iTunes with iPhone Unlocker:
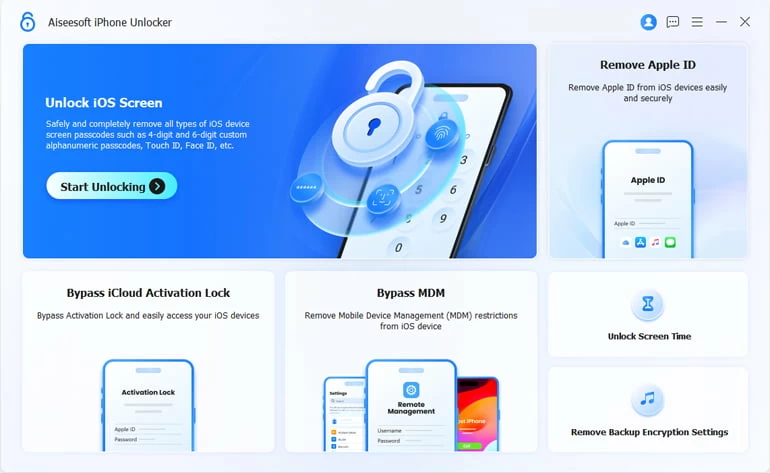
1. Download and Launch the software on the computer. Then choose Unlock iOS Screen in the interface.
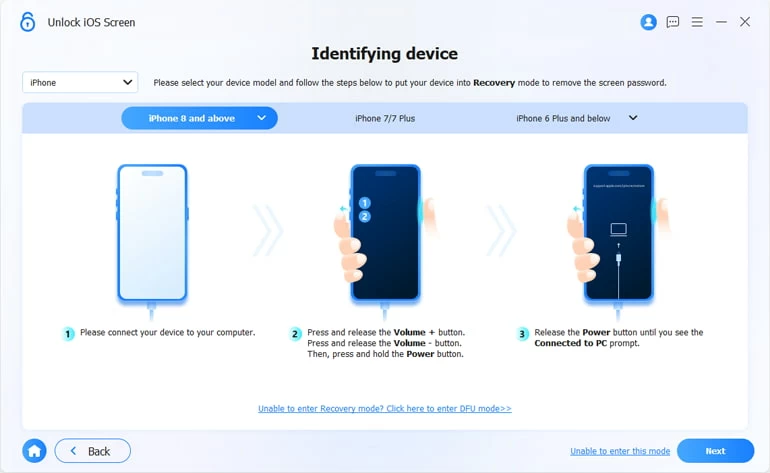
2. Plug the disabled iPhone into computer with a USB cable. Then follow the guidance to put your iPhone into Recovery Mode according to your model.
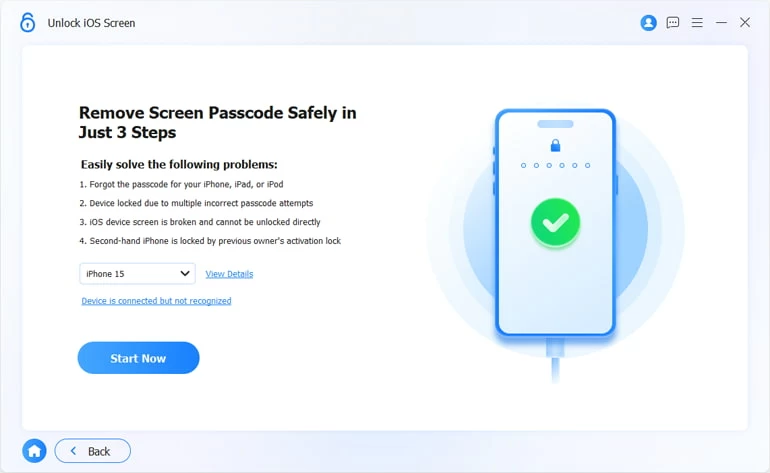
3. Select the correct details of your device and click Start Now.
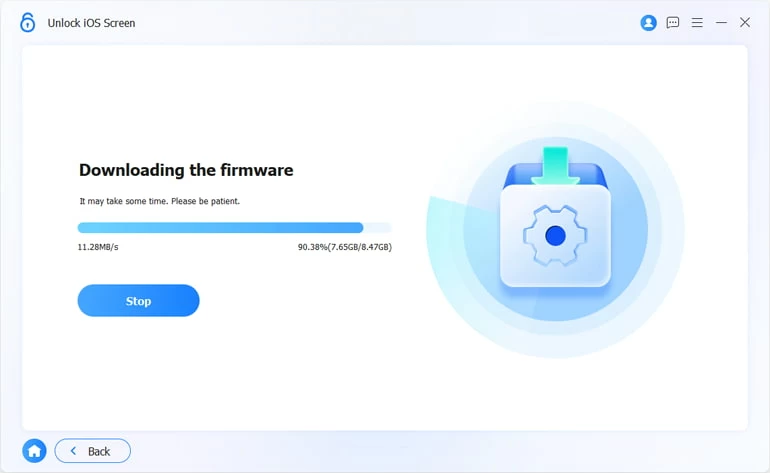
4. The firmware package will begin downloading, which will take a while.
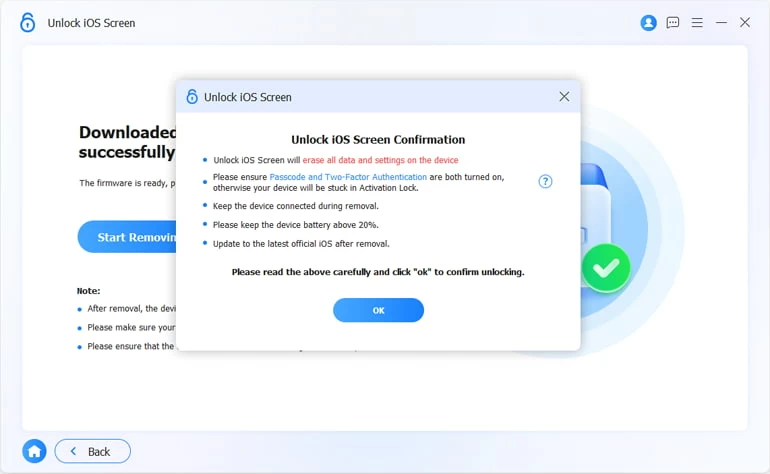
5. When the download ends, click OK in the pop-up confirmation window and then click Confirm Again.
6. In the unlocking process, keep your iPhone connected to the computer and make sure your Internet works steadily.
After the reset is completed, the iPhone will no longer be disabled. Follow the onscreen instructions to set it up based on your needs and restore your data from a backup if you have one.
Factory reset disabled iPhone without iTunes via Find My app
If you have another iOS device around, whether it's an iPhone or iPad, you can reset the disabled iPhone by Find My app on the other iOS device without iTunes. Find My app can do the same thing as iCloud Find My iPhone.
If you have enabled Find My on your disabled iPhone before and the disabled iPhone is connected to the network, check out this method:
1. Open Find My app on the other iOS device, if it's removed, go to App Store to get it back.
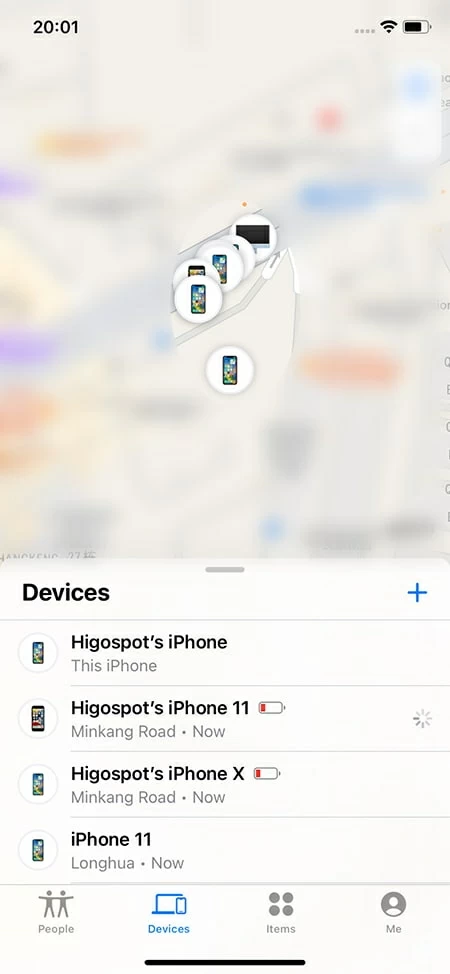
2. At the bottom, tap on the Devices option, then tap the disabled iPhone you want to reset.
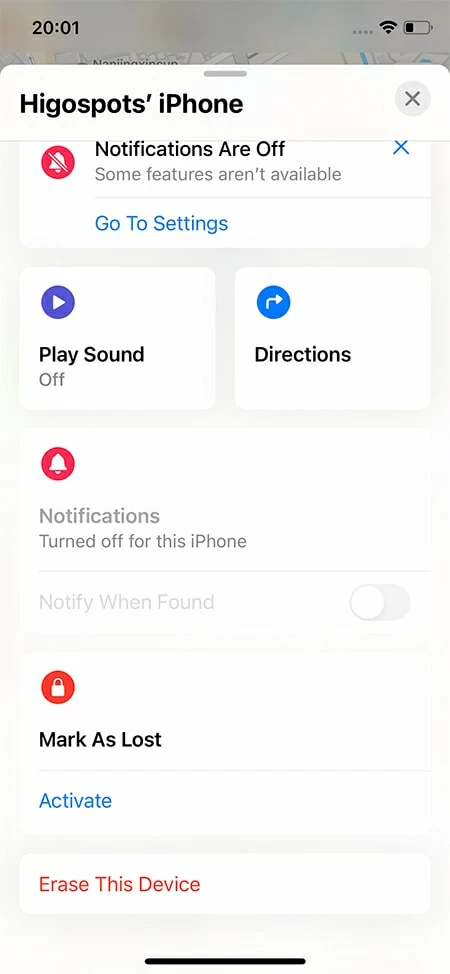
3. Stroll down to the bottom and choose Erase This Device option, then tap Continue.
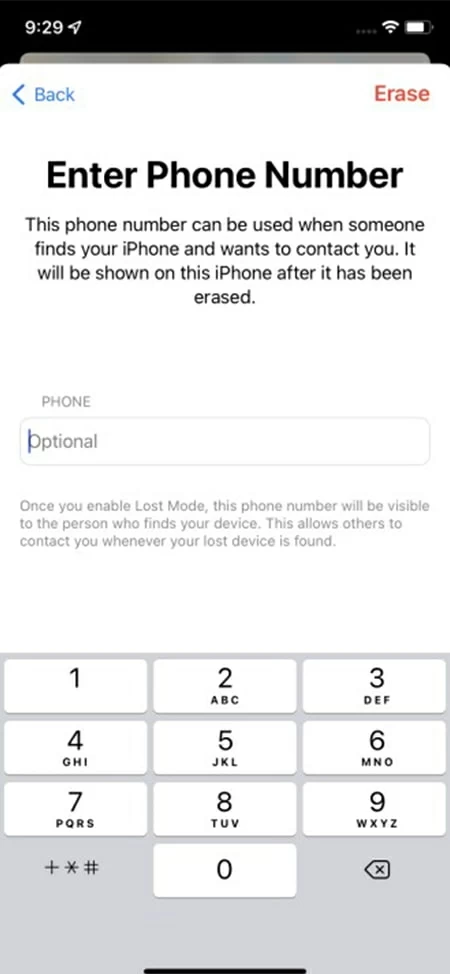
4. Tap on Erase in the upper right corner of the Enter Phone Number screen.
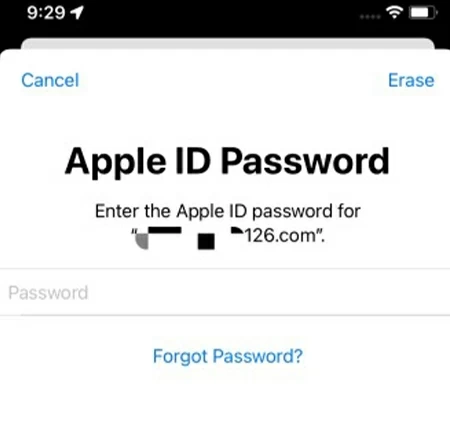
5. Enter your Apple ID password and tap Erase again, the reset will begin itself.
When the reset is over, you can set up your iPhone from scratch, and you can restore your backup if you had one during this process.
Reset disabled iPhone without using iTunes via Finder
Finder is an application that comes with macOS, and it can be used to reset your disabled iPhone. If you're using a Mac and wonder how to reset disabled iPhone without needing iTunes, Finder can do you this favor:
1. Unplug your disabled iPhone if it's connected to Mac.
2. Click the Finder icon on the dock.
3. Turn off the iPhone as usual.
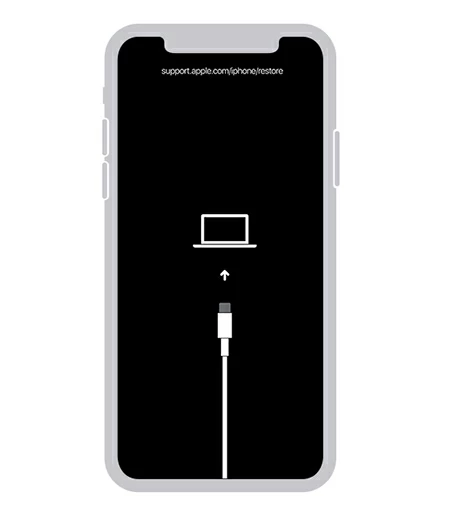
4. Boot the disabled iPhone into Recovery Mode and plug it into Mac.
With iPhone 8 or later: Hold down the Side button while promptly plugging your disabled iPhone into Mac until the Recovery Mode screen appears.
With iPhone 7 or 7 Plus: Press and hold the Volume down button while instantly connecting your iPhone to Mac. Release the button when you see the Recovery Mode screen.
With iPhone 6s or prior: Long press the Home button while immediately plugging your device into Mac, and let go when the Recovery Mode screen shows up.
5. In Finder, choose Restore in the pop-up window.
6. Then, select Restore and Update.
7. Click Agree to confirm the terms and the disabled iPhone will begin resetting.
How to back up iPhone
Your iPhone usually keeps your precious content, but you have to reset the iPhone when it's disabled, and all the content will be erased, which is a huge price to pay. To avoid all data loss again, it's necessary to spend time making a backup of your iPhone regularly. You can back up the iPhone with iCloud, or you can use a computer (Mac/PC) to perform the backup.
How to make a backup of your iPhone via iCloud:
1. Ensure your device is connected to power and a stable Wi-Fi network.
2. Open Settings on iPhone, tap your Apple ID at the top and tap iCloud.
3. Go into iCloud Backup.
4. Tap on Back Up Now.
Note: Apple offers 5GB of free storage to iCloud users. If you get an alert that you don't have enough storage space, you can follow the onscreen instructions to pay for more storage and then continue with your iCloud backup.
Back up iPhone on PC or Mac via iTunes:
1. Download and install iTunes on computer if you don't have it already.
2. Launch iTunes and connect the iPhone computer with a USB cable.
3. In iTunes, click Continue, select Trust on iPhone and you might also be asked to enter your screen passcode.
4. Click the iPhone icon on the menu bar.
5. Select Summary and select Back Up Now at the bottom of the Backup section.
Back up iPhone on Mac via Finder:
1. Plug your iPhone into Mac.
2. Click the Finder icon in the Dock to launch it.
3. In Finder, click the iPhone you want to back up on the left side.
4. Choose Trust and enter your screen passcode to allow Mac to connect to the iPhone.
5. Click General and then check the option of "Back up all of the data on your iPhone to this Mac."
6. Select Back Up Now.
When the backup process ends on the computer, you can see the date of your last backup, and check whether it was completed successfully. Please remember to back up your iPhone from time to time in case the iPhone is disabled and you need to reset it again.
About Sandy Archila
Sandy Archila has been writing about technology for 5 years. She has extensive experience in helping people solve technical problems and delving into iOS, Android, macOS, and Windows platforms.
 iPhone UnlockerRemove iPhone & iPad lock screen
 iPhone Data TransferTransfer and manage your iPhone & iPad data
 Android UnlockerRemove Google FRP lock and bypass screen locks
 iPhone Data RecoveryRecover deleted files from iPhone, iPad
 Location ChangerFake a GPS location easily
 Video DownloaderDownload videos from 1000+ sites