How to Change the Location on Your iPad
Feel like a location change on your iPad? Check out these simple and easy ways to change your iPad's location without jailbreaking the device.

Pauline Larson
Updated on Dec 19, 2025
There are a few effective ways for you to change the GPS location on your iPad.
GPS location tracking is an amazing feature of an iPad. You can share your real-time location with your friends and family members to stay on track. Besides, the option prevents you from getting astray and making through complicated routes.
However, you may want to change your iPad's location now and then. For instance, you can't enjoy streaming services like Netflix due to geo-restrictions until you change the iPad location; or you may also want to prank your friends on Twitter or Facebook with a location change on your iPad.
In any case, you don't need to jailbreak your iPad for the change of your location. Instead, you have several options to change the iPad's location with ease, like using a VPN or a brilliant software, Location Changer.
Note: Changing the iPad location is perfectly legal, so please don't worry. But noted that it might restrict you from downloading any apps that's available to you before from the Apple App Store.
Table of Contents
How to change your iPad's location in Settings
Probably, the simplest method to change the location on your iPad is to use Settings, as this method does not require any technical knowledge or expertise. Let's see the notes and steps about taking this approach.
Things you need to do before changing the iPad location
- Spend all the remaining balance you have on your Apple ID.
- Cancel all your Apple ID subscriptions and wait until it comes to an end.
- Wait for the completion of orders, memberships, or movie rentals and processing of any pending store credit refunds
- Check if you have a payment method for your newly changed region.
- Redownload all the apps, media, and books on another device, as some of them may be unavailable in your new country or region.
Steps to change the location on your iPad in Settings
Once you've performed the aforementioned actions, you can change your iPad's location by following these steps:
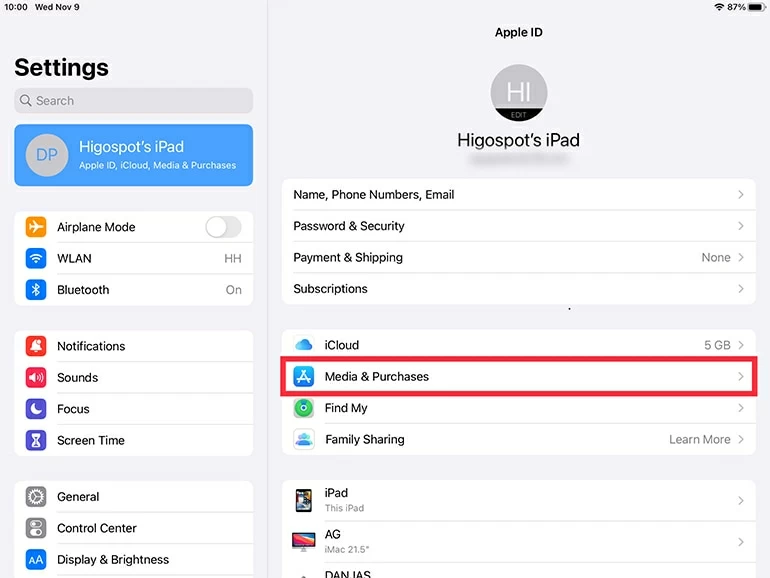
1. Go to Settings in your iPad and tap your name. Select Media & Purchases.
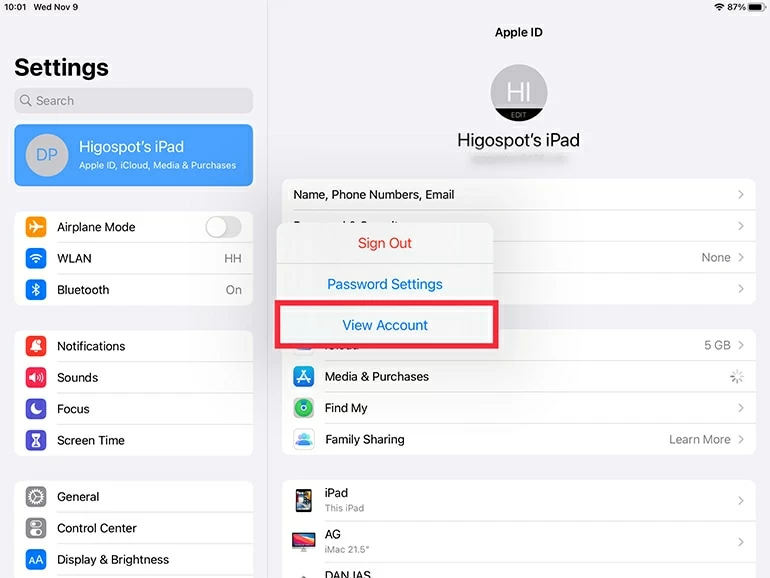
2. From the pop-up menu, tap View Account.
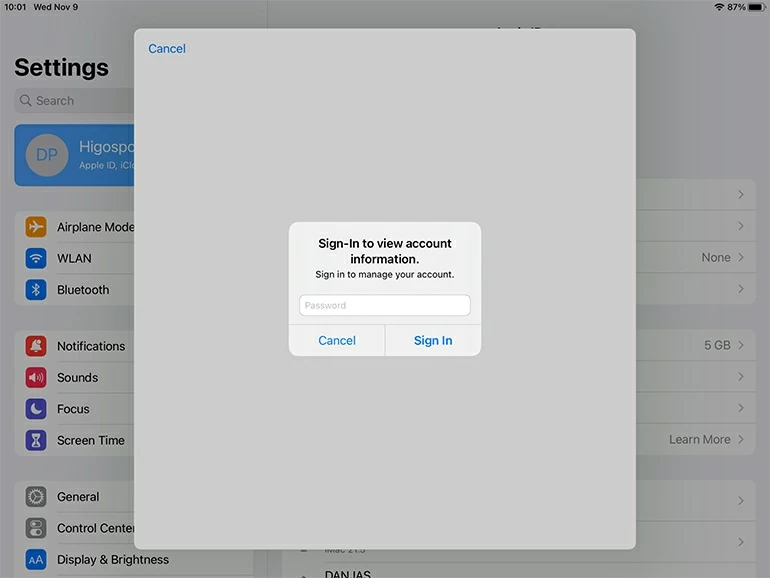
3. Enter your Apple ID password to sign in.
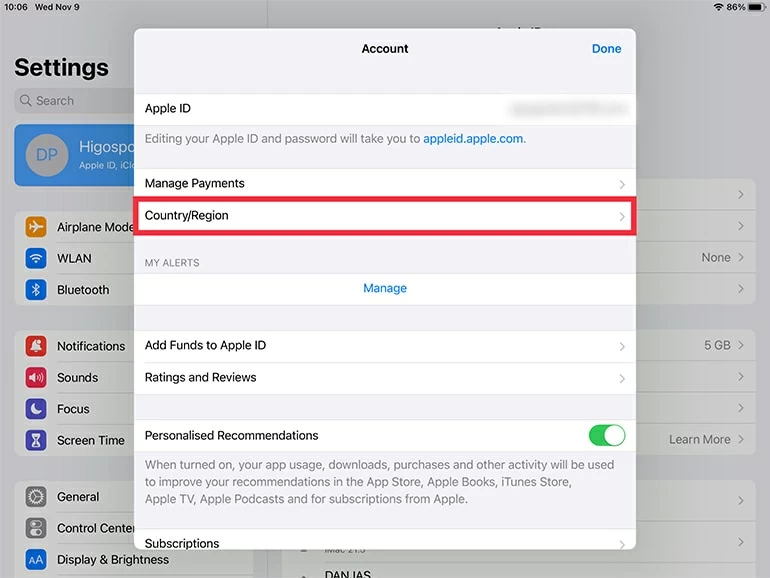
4. Tap Country/Region.
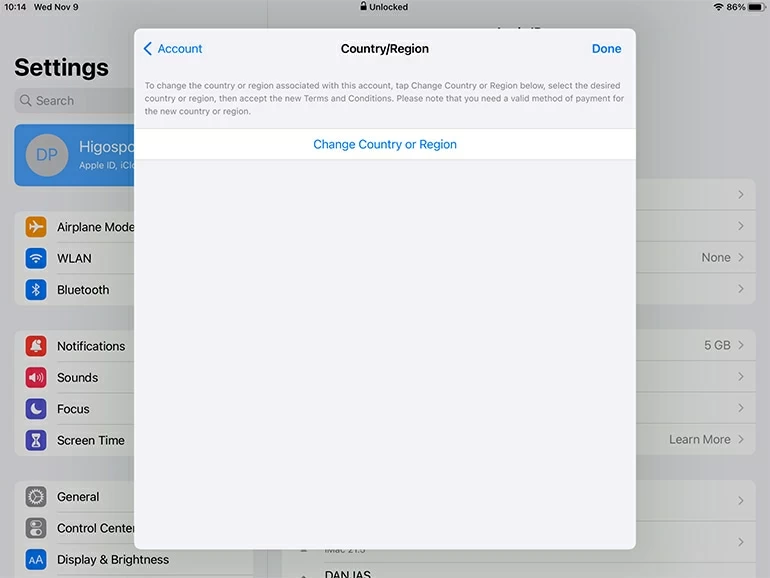
5. Tap Change Country or Region.
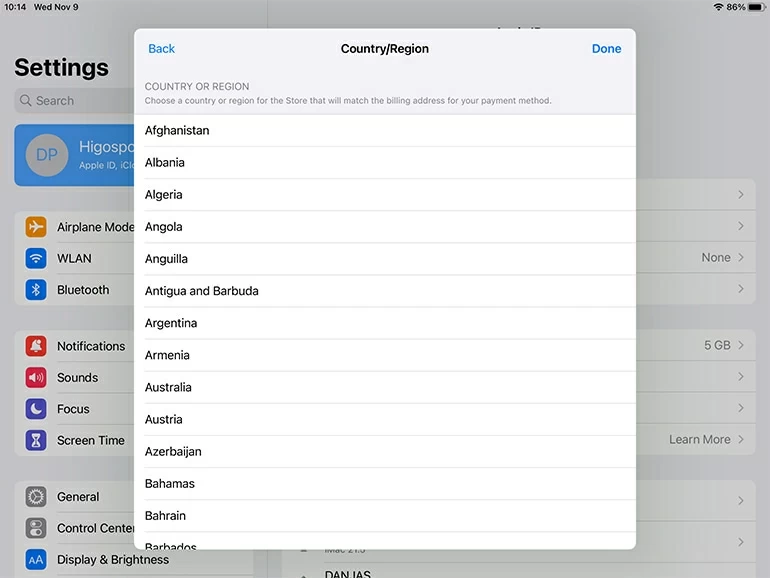
6. Select your designated country or region from the list.
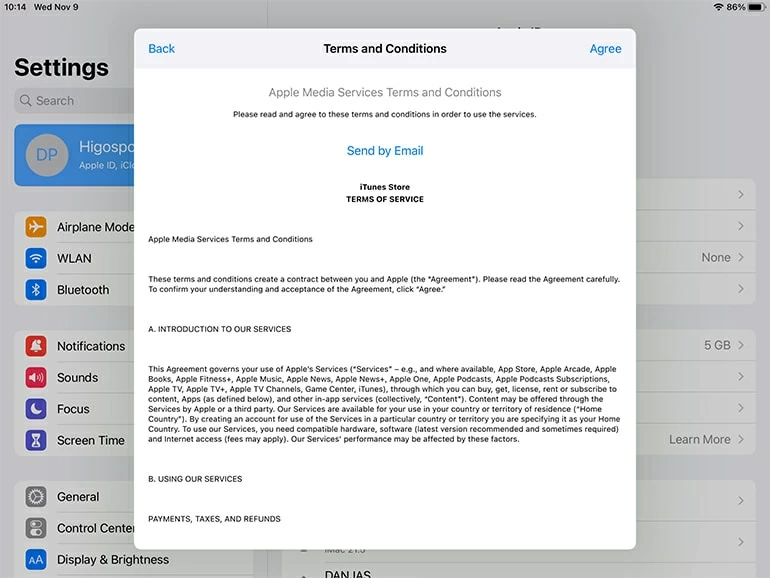
7. Review the Terms & Conditions first, and tap Agree. Tap it again if a prompt shows up later.
8. Select a payment method for the new country or region. Also, fill out the correct payment information and tap Next.
Soon your region will be changed on the iPad. Feel free to reach the content that's not available to you before.
How to change an iPad location via Location Changer
If you'd like to change your iPad location to a more specific place, try Location Changer. With a user-friendly layout, this desktop software makes it easy for iOS users to change their iPad's GPS locations to anywhere at will. Better still, it can simulate GPS movements along your preferred route at a customized speed, which spares you the trouble of travelling around the world if you play location-based games like Pokémon GO.
Free Download Free Download
Tip: This software is compatible with iPad and iPhone to change the location, whatever the model and iOS version.
Here's a guide on how to fake the location on your iPad by Location Changer.
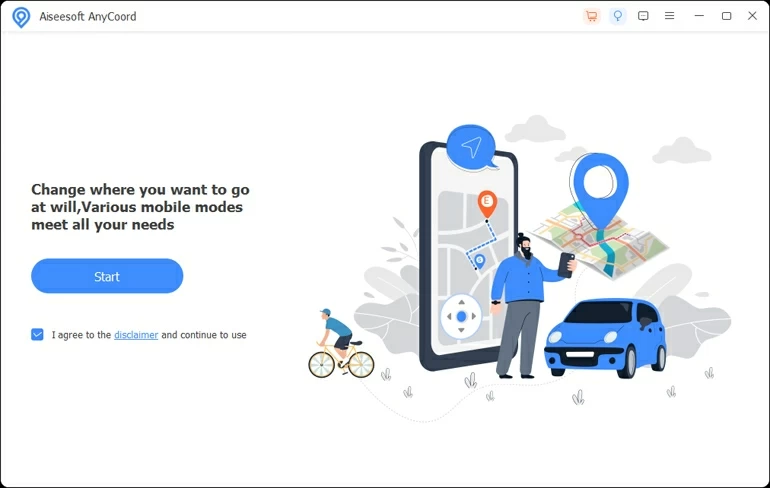
1. Launch the software on your Mac or PC, and hit Start.
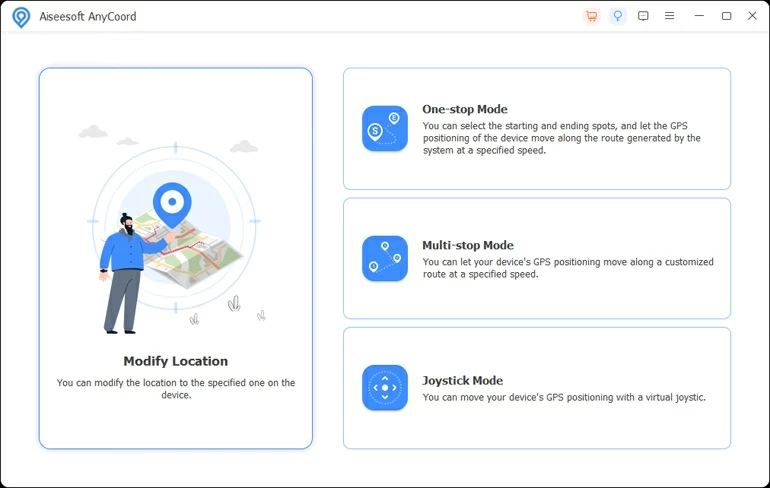
2. Plug your iPad into the computer and make the device recognized by following the onscreen instructions. Once your iPad is detected, a menu with 4 options will appear. Select Modify Location in the left.
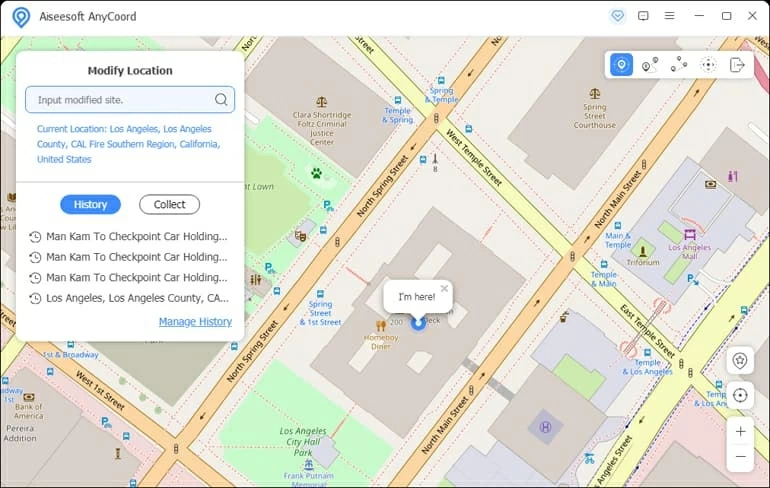
3. Later, the screen will display a virtual map showing your current location. In the upper-left corner, enter a place name that you want your iPad to change the location to.
Note: You'll need to turn on Developer Mode in your iPad for changing the location.
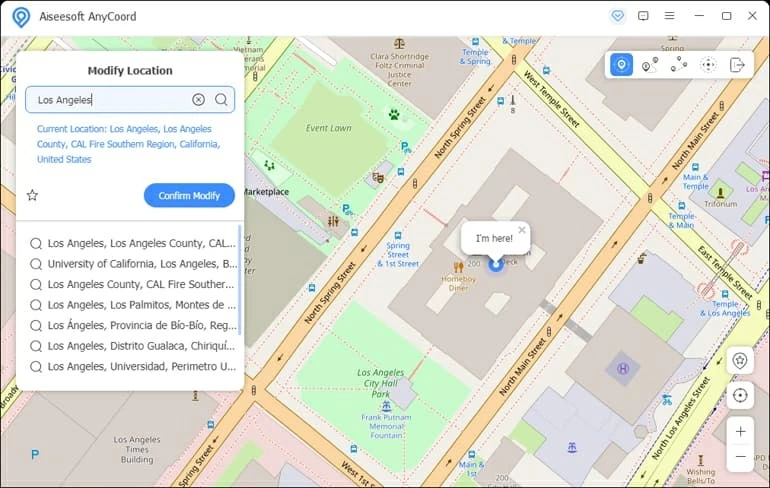
4. Select a destination from the search list and click Confirm Modify. In no time will your iPad's location be changed to where you've selected. You can check it on the Apple map in your iPad.
Tip: In case that you want an iPad location change to the same location next time, you can save the location as a favorite for convenience.
If you want your iPad to locate where you are in real time, just restart the device and it will get your actual location instead of the changed one.
How to change the location on your iPad by using VPN
Alternatively, you can use a reliable VPN to change your iPad's location. The Apple App Store offers plenty of VPN options for you and you are free to select any one as you like.
Here we will show you how to do it by use of NordVPN, which is a rather reputable and secure VPN in terms of iPad location changing.
1. Download and install NordVPN on your iPad.
2. Create a new account or sign in to your NordVPN account, and buy a subscription.
3. If asked for permission for VPN configurations, tap Allow to proceed.
4. Select a server, according to the region you want your iPad location to be faked to.
5. Tap Quick Connect and wait for a few seconds until a connection with the VPN is established.
6. Clear the cache and cookies in your iPad's Settings to delete any information that may reveal your actual location.
The location on your iPad will be changed successfully then.
GPS Changing Problems of iPad
Changing iPad's location is not helpful all the time, as there are still some drawbacks you may need to stand with:
- You may be unable to find directions in your region or get local weather updates after changing the location on your iPad.
- Some apps, music, movies, TV shows, and books that you could access before may become unavailable because of the iPad's location change.
- You may be banned from the use of some apps if you are caught spoofing the iPad location.
Bonus – How to change weather location on your iPad
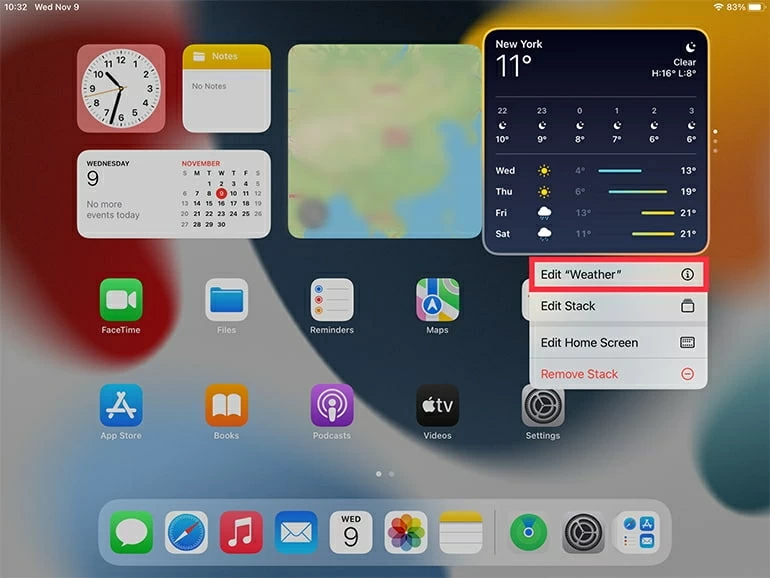
Suppose you've recently landed in London, but your iPad weather widget is showing results for New York. To change the weather location on your iPad easily, take the steps below.
1. Long-press the weather widget on your iPad until a list appears from below. Tap Edit "Weather."
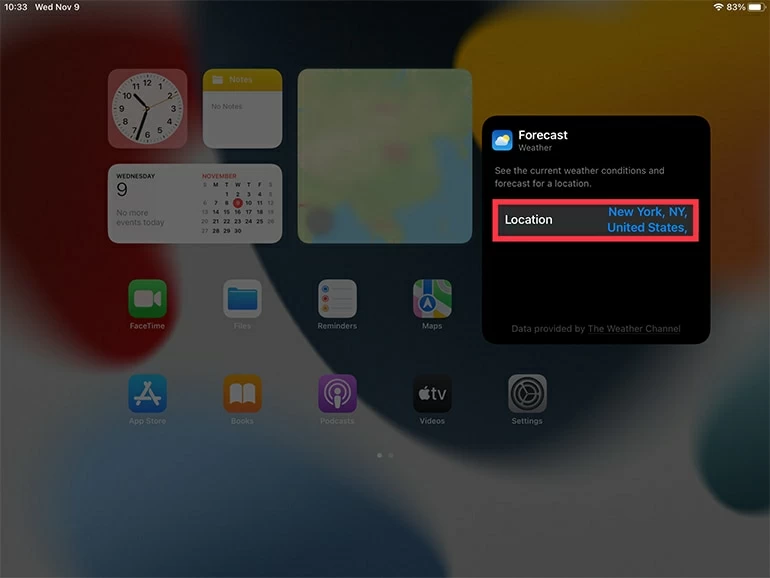
2. Tap Location.
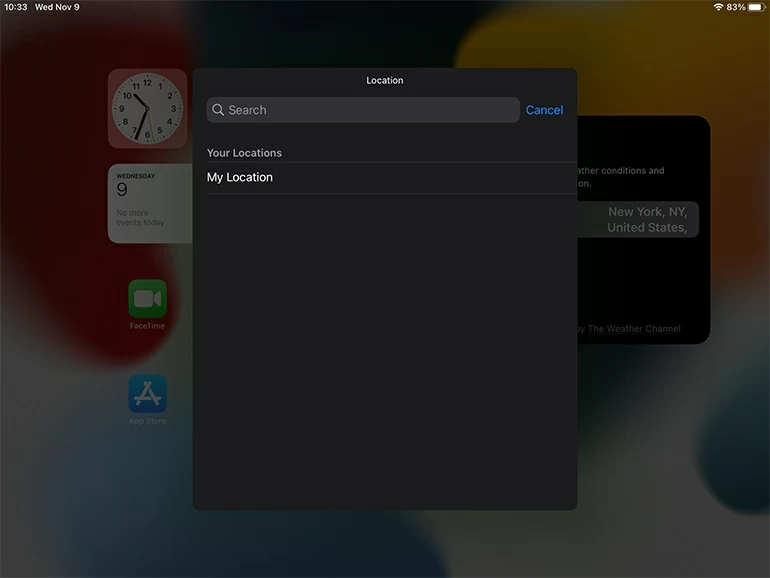
3. Search for a location manually in the field. Select one from the searching results.
After the selection, tap anywhere on the home screen, and the weather location will be updated.
FAQs
- 1. How to turn on or off the location services on my iPad?
- Sometimes you may want to stop your iPad from accessing your locations for privacy protection. In this case, you can turn off the location services in Settings > Privacy and Security (Privacy) > Location Services, and switch off the toggle. If you feel like enabling it afterwards, you can switch on the toggle then.
- 2. How to reset the location settings on my iPad?
- Follow these steps to reset your iPad location settings to the original state: Go to Settings > General > Reset, and select Reset Location & Privacy.
- 3. How to check the location history on my iPad?
- The location history allows iPad users to review the places they have visited within a specified period. Just go to Settings > Privacy and Security (Privacy) > Location Services > System Services > Significant Locations, and you'll see the location history.
About Pauline Larson
Pauline Larson is a writer and journalist who has been well-experienced in technology industry for almost 10 years. She has posted various professional articles in different tech-related sites and magazines, as she is deeply fascinated with digital technology, especially with Apple's products.
 iPhone UnlockerRemove iPhone & iPad lock screen
 iPhone Data TransferTransfer and manage your iPhone & iPad data
 Android UnlockerRemove Google FRP lock and bypass screen locks
 iPhone Data RecoveryRecover deleted files from iPhone, iPad
 Location ChangerFake a GPS location easily
 Video DownloaderDownload videos from 1000+ sites